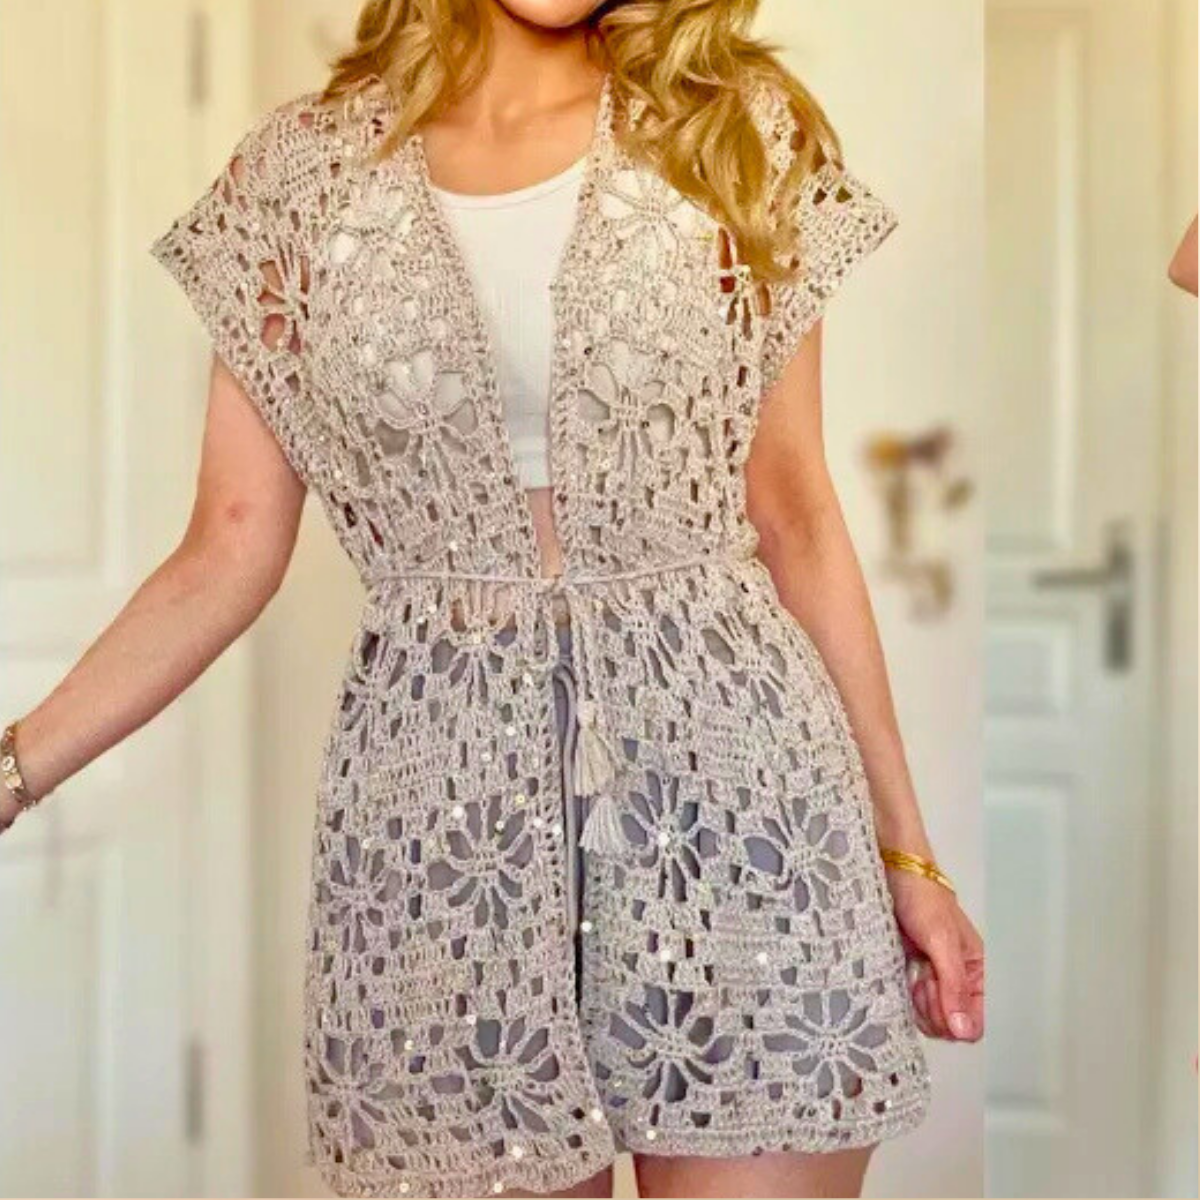
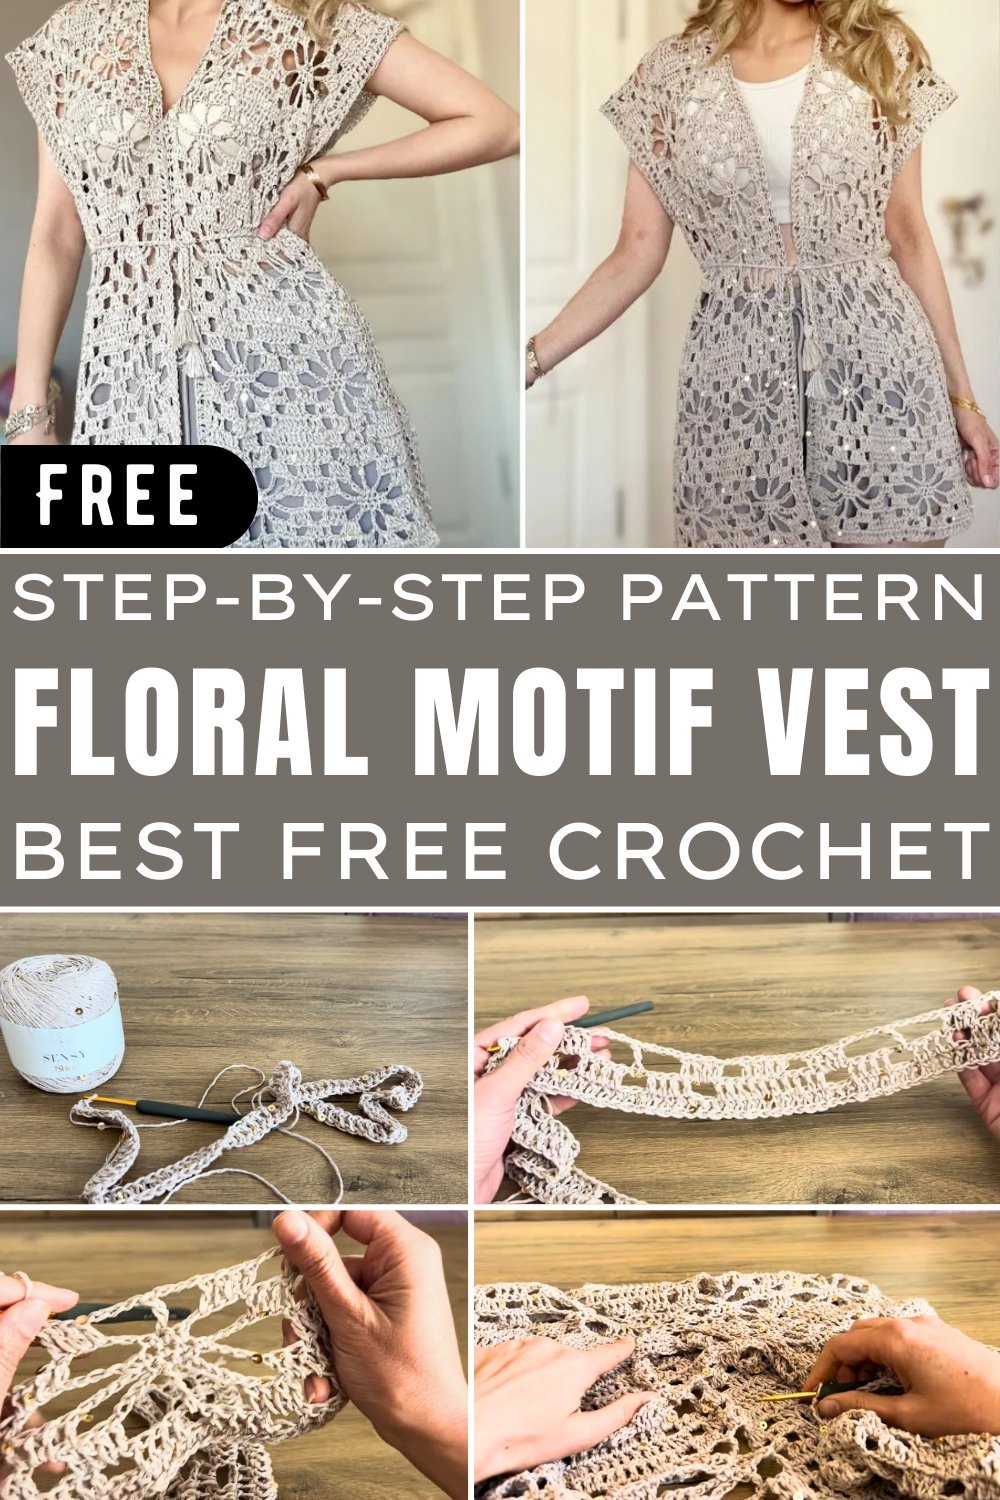
Unique Crochet Floral Motif Vest Pattern You’ll Love to Wear
Hook into the joy of crochet Floral Motif Vest—turn heads with a fresh pop of style and personality for your wardrobe.
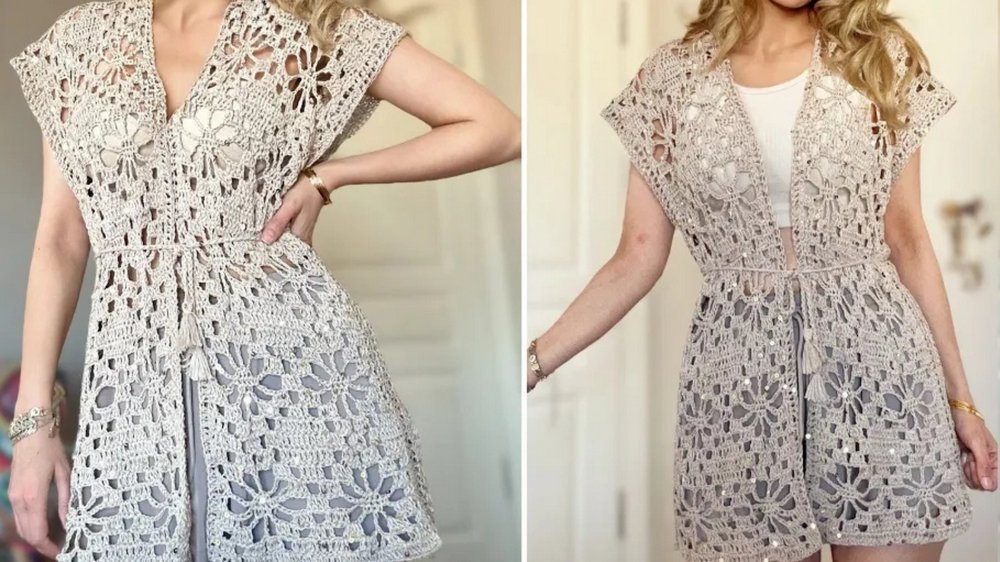
Nothing brings a touch of elegance and individuality to your wardrobe like handmade clothing. A crochet floral motif vest design is a stunning addition that combines delicate artistry with functionality. Ideal for layering, it pairs beautifully with dresses, long-sleeve tops, or even casual shirts, adding a whimsical statement to your outfit. This timeless accessory is not only fashionable but also comfortable, perfect for any season.
Handmade Crochet Floral Motif Vest Pattern for Beginners
With its intricate floral details, this design allows for endless personalization, enabling you to experiment with colors and textures that suit your style. It’s a perfect choice for those who want to express their creativity through wardrobe pieces. Lightweight yet warm, the vest is a fantastic option for transitional weather or adding a soft touch of elegance to casual ensembles.
A beautiful piece like this isn’t just about style it also offers relaxation and mindfulness during the process of designing it. This wearable art can become a thoughtful gift for loved ones or an heirloom-worthy piece you’ll cherish in your closet for years. Whether it’s for casual outings or special occasions, this project combines utility, beauty, and endless creative possibilities while enhancing any outfit it adorns.
How to Crochet Floral Motif Vest – Step-by-Step Guide
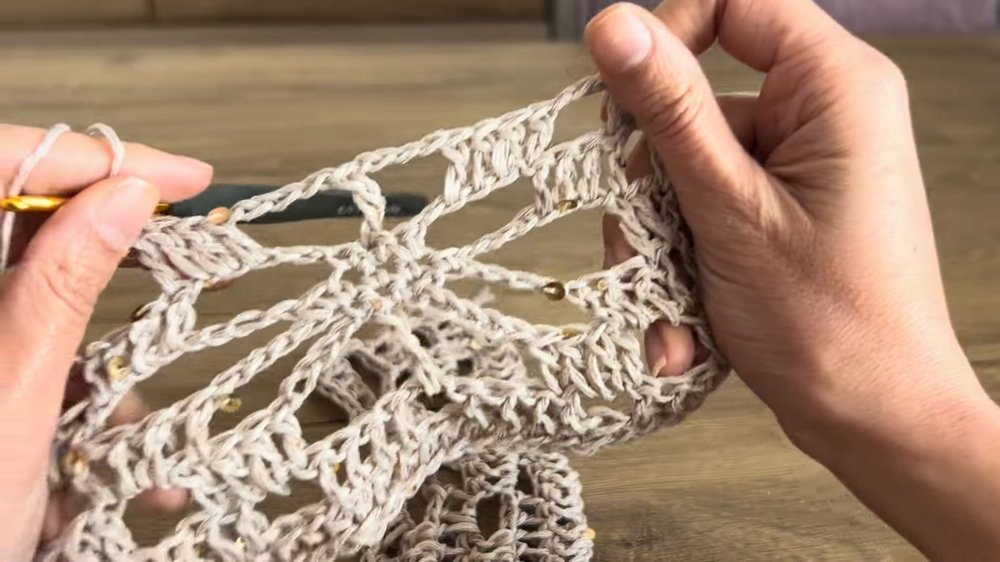
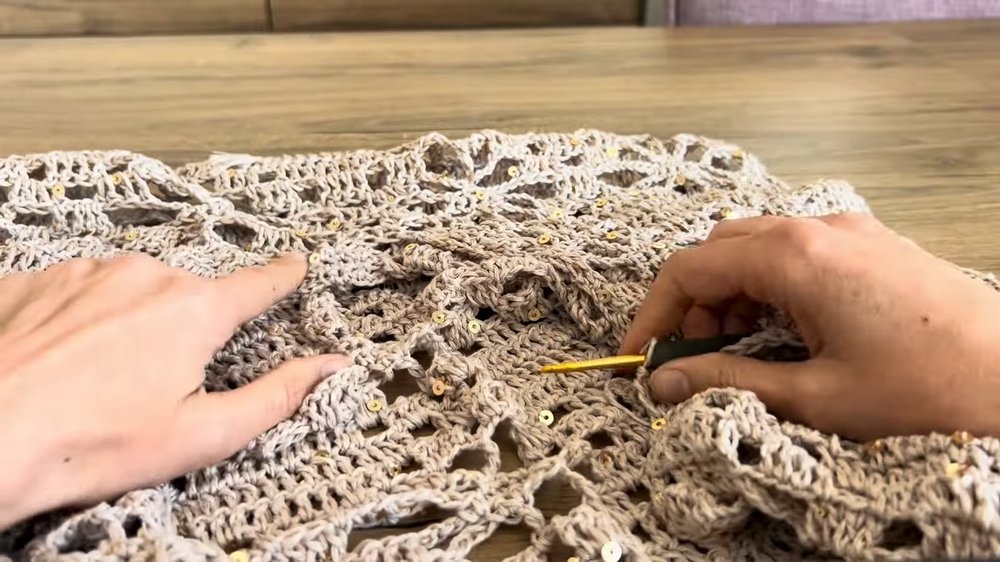
In this pattern, you’ll learn how to crochet a beautiful and casual Floral Motif Vest using cotton and sequined yarn a perfect choice for summer wear or stylish layering. This vest features an intricate design with “spider” motifs and lace details, combining elegance with practicality. Ideal for those looking to enhance their crochet skills and create a standout handmade garment.
Highlights
1. Special Features of the Vest
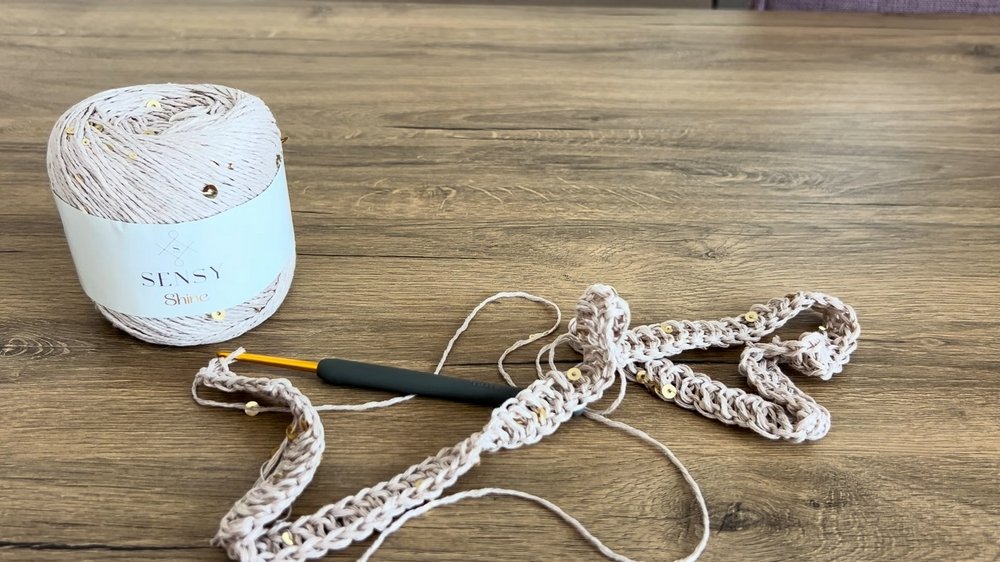
- Elegant Yarn Choice: The vest is crocheted with Sens Shine yarn, a unique sequined cotton blend, which adds a subtle shimmer and sophistication.
- Flexible Fit: The design prioritizes comfort and stretch, making it casual yet chic.
- Spider Motifs: The body of the vest features delicate spider-like patterns that add visual interest and texture.
- Customizable: The pattern allows for easy size adjustments to fit your body.
- Tassel Detail: Eye-catching tassels are added to the laces for a decorative touch.
2. Materials Used
- Yarn: 2.5 balls of Sens Shine yarn (75% cotton, 340 meters per 100g, with sequins for shimmer).
- Hook: 3.5 mm crochet hook (used for a more flexible and casual finish).
- Measuring Tape: To ensure accurate dimensions of the vest.
- Scissors and Yarn Needle: For cutting yarn and sewing seams.
- Stitch Markers: Used to mark and separate sections.
- Optional Accessories: Tassels and chains for lace details.
3. Vest Dimensions
- Length: Approximately 72 cm (before stretching or ironing).
- Width: 56 cm (can expand slightly upon ironing).
- Spider Motifs: Six rows of motifs are used to create the back and front panels.
Step-by-Step Details
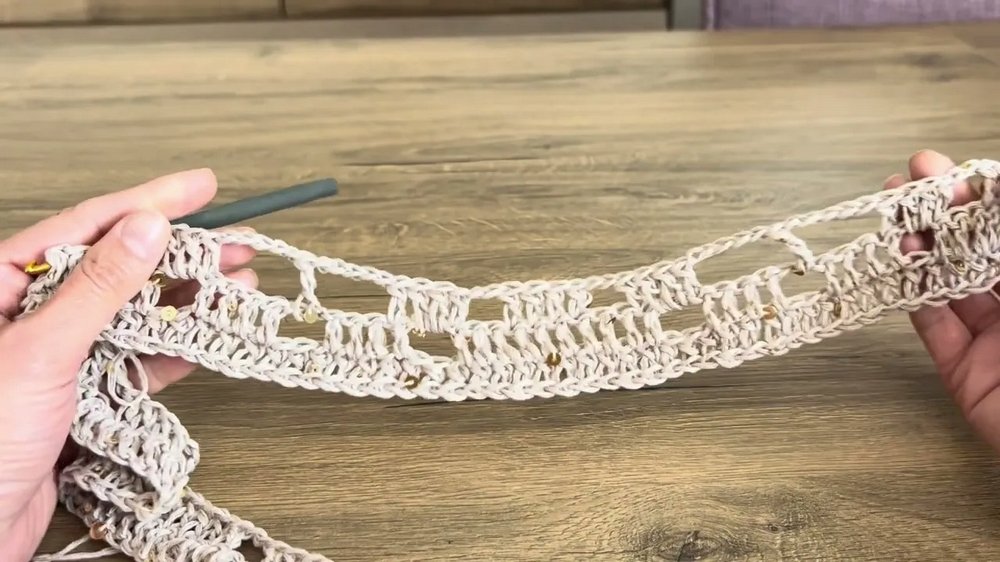
1. Starting the Base
- Begin by making 95 chains as the foundation for the vest.
- Use double crochets to form a sturdy base (following a chain + banister system).
2. Setting up the Pattern
- Work six banisters at the edge to create the frame.
- Design spider motifs and double crochets in alternating groups:
- Spider Motifs: Skip two spaces, create “flower-like” or “spider-form” patterns with a double crochet base.
- Double Crochets: Groups of 10 are placed between spider motifs.
3. Increasing and Decreasing
- (In Rows) Gradually adjust the number of spider motifs to balance the layout: start with single motifs and build toward a symmetrical layout by adding double crochets alongside them.
4. Working the Front and Back Panels
- After creating six rows of spider motifs, divide the vest for the body (front and back panels).
- Use two spider motifs per side for the front panel and center the back portion.
5. Adding Edging
- For a polished look, crochet double crochets along the edges (two rows on the outer edge, one on the inner edge). This provides definition and stability.
6. Adding Laces and Tassels
- Make a decorative 150 cm chain for the laces.
- Add tassels to the laces to enhance the aesthetic and secure the vest around the waist.
7. Finishing Up
- Sew the side seams, leaving a suitable armhole opening.
- Adjust based on personal preference for a looser or tighter fit.
Tutor’s Suggestions
- On Yarn Selection: The tutor praises Sens Shine yarn’s quality and appearance, but emphasizes it’s not a sponsored product—it’s simply her favorite for this project.
- Gauge and Flexibility: Use a 3.5 mm crochet hook instead of the standard recommendation for the yarn (2.5–3 mm). This keeps the vest more casual and stretchable.
Level of Difficulty
- Intermediate:
- The design involves spider motifs, increases, decreases, and lace detailing, making it more suitable for crocheters with basic intermediate experience.
- Beginners can follow along by closely referencing the written instructions and video pauses.
Practical Uses
- Summer Look: Lightweight and breathable, it’s perfect for hot weather.
- Layering Piece: Can be styled over t-shirts, tank tops, or dresses for a chic casual vibe.
- Customizable Gift: Personalize the size, color, and tassel details to make it a perfect handmade gift.
Tips for Success
- Stay Organized: Follow the pattern row by row to avoid losing count of stitches.
- Loose Tension: Keep your stitches relaxed to achieve the desired flexibility and casual appearance.
- Block the Vest: Lightly iron or block the vest after finishing to enhance its shape and drape.
- Test Fit Regularly: If you’re making adjustments, try on the vest frequently to ensure a proper fit.
Conclusion
This delicate and stylish Crochet Floral Motif Vest is the perfect addition to any wardrobe. With its intricate spider motif, shimmering yarn, and customizable fit, it’s both a fun project and a rewarding garment to wear. Whether you’re making it for yourself or someone special, enjoy the process and showcase your creativity. Don’t forget to share your creation with others and leave a comment or like if you found this guide helpful!