Cute Crochet Baby Yoda Pattern for Nursery Decor
Channel your inner Jedi with our charming Crochet Baby Yoda Pattern—ideal for creating a heartfelt gift or an adorable addition to your Star Wars collection.
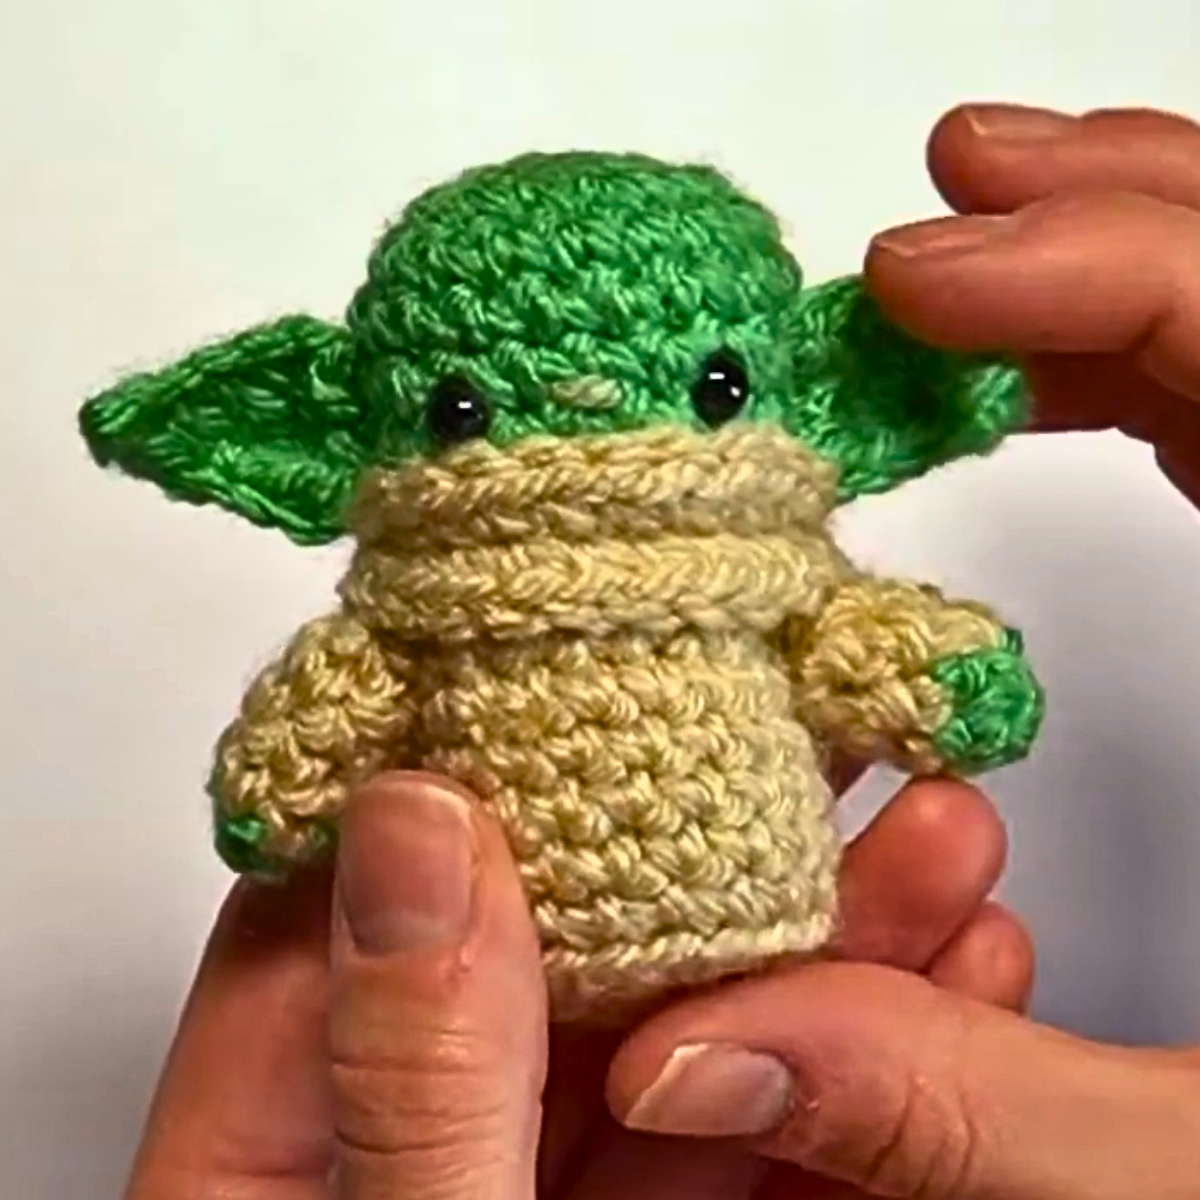
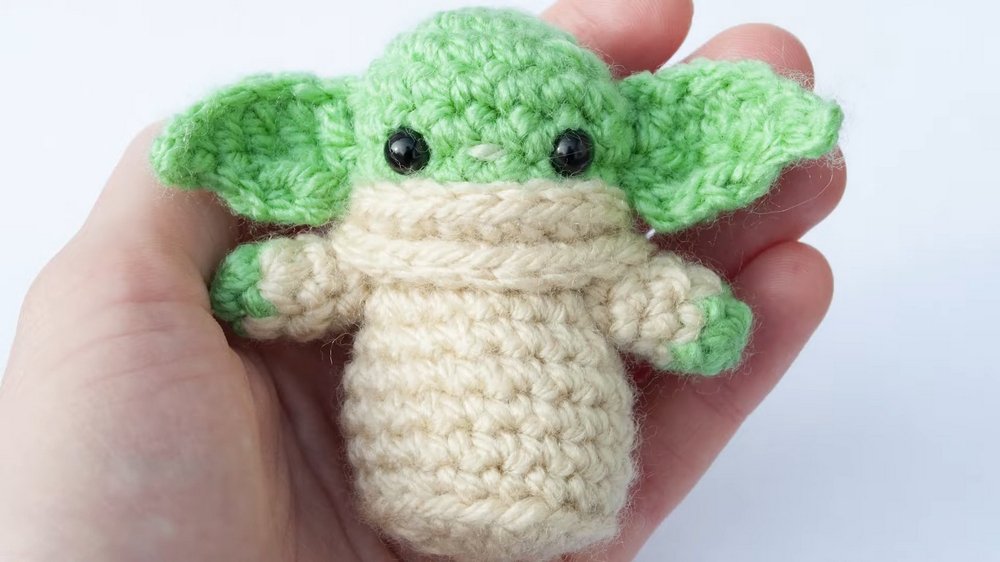
In a galaxy not so far away, a sweet little character has stolen the hearts of many Baby Yoda! Known for his endearing eyes and iconic ears, he has become a favorite inspiration for crochet enthusiasts. This adorable amigurumi design brings your love for creativity and fandom together, offering both a fun challenge and a rewarding result. Perfect as a heartfelt gift for family, a thoughtful handmade toy for children, or a delightful décor piece for your living space, this creation offers endless uses for Star Wars fans and beyond.
Charming Crochet Baby Yoda Pattern for Star Wars Fans
Made using soft yarns, the finished item can be as cuddly as you want it to be. Its compact size makes it an amazing collectible or even a cute desk companion. Beyond the joy of the finished product, the process itself is a great way to relax and improve your crochet skills at any level. It’s a therapeutic pastime that leaves you with something you’ll adore.
Beyond its practicality, this fan-favorite makes for a memorable keepsake. Whether it’s for a themed nursery, a playful addition to your mantle, or a cherished gift for a loved one, this crochet figure brings charm and imagination to life. It’s an opportunity to express creativity while celebrating a much-loved character.
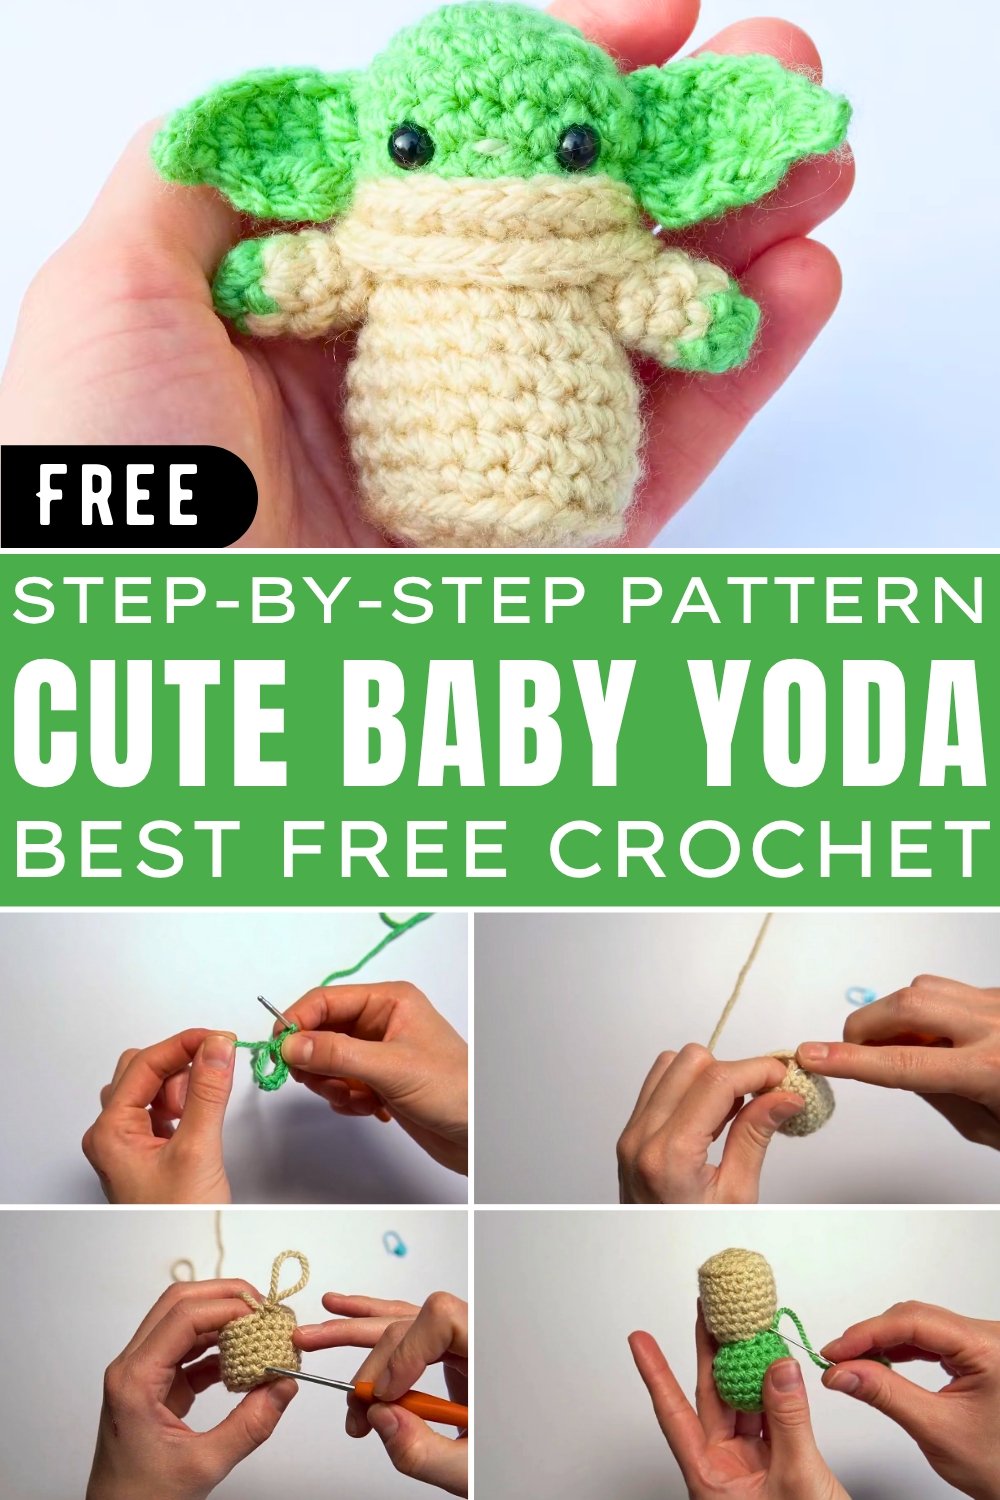
How to Crochet Your Own Cute Baby Yoda: Step-by-Step Guide
Creating your own crochet Baby Yoda can be a fun and rewarding project for crocheters of all levels. Along with its special features, level of difficulty, suggested materials, and uses. Whether you’re a beginner or an advanced crocheter, this adorable project is perfect for fans of the iconic character!
Special Features
- Iconic Design: Captures the cute features of Baby Yoda, including large ears, safety eyes, and a tiny scarf.
- Detachable Parts: Individual components of the project—ears, arms, and scarf—are assembled separately, allowing room for customization.
- Compact Size: Small enough to display or carry as a fun keepsake.
Level of Difficulty
This project is suited for confident beginners or intermediate crocheters. While the steps are fairly straightforward, familiarity with magic circles, invisible decreases, and basic stitches (such as single crochet, half double crochet, and double crochet) is necessary to achieve the desired look.
Tutor’s Suggestions
The tutor highlights several tips throughout the video:
- Use Tight Stitches: A 3.0mm crochet hook is recommended for tighter, cleaner stitches that secure the stuffing inside.
- Keep Track of Rounds: Use a stitch marker to ensure consistent shaping when working in the round.
- Stuff Firmly: Fill the head and body with polyester stuffing, keeping the shape firm while avoiding overfilling.
Materials Required
- Size 4 acrylic yarn in three colors: spearmint green, pistachio green, and vanilla cream.
- Crochet hook: 3.0mm for tight stitches.
- Safety eyes and backings.
- Polyester stuffing for shaping.
- Darning needle for sewing the parts together.
- Scissors.
- Optional pins for positioning parts prior to sewing.
Step-by-Step Instructions
Head
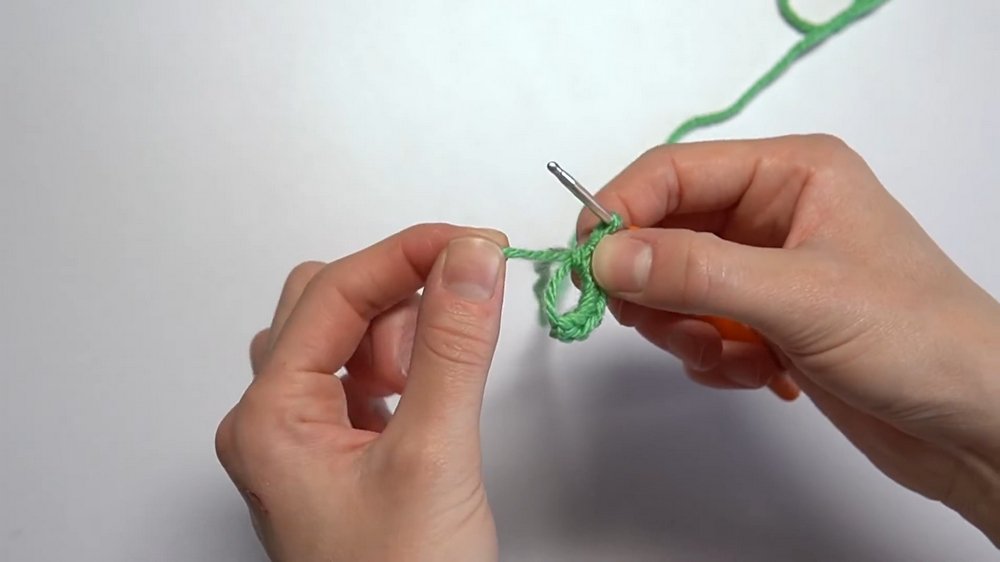
- Begin with spearmint green yarn and make a magic circle of 6 stitches.
- Follow the rounds to increase the size:
- Round 2: Increase in every stitch (12 stitches total).
- Round 3: Single crochet, then increase alternately (18 stitches total).
- Rounds 4-6: Single crochet only (maintains 18 stitches).
- Finish the head with invisible decreases on every other stitch. You’ll end with 12 stitches. Leave enough yarn to sew.
Body
- Start with vanilla cream yarn and create a magic circle of 6 stitches.
- Follow the rounds to form the body:
- Round 2: Increase in every stitch (12 stitches).

- Round 3: Alternate single crochet and increase (18 stitches).
- Round 4: Single crochet into back loops only (18 stitches). This creates a ridge for stability.
- Rounds 5-9: Single crochet around (18 stitches).
- Round 2: Increase in every stitch (12 stitches).
- Adjust for alignment by adding an extra single crochet stitch.
- Use invisible decreases in the final two rounds to end with 9 stitches. Leave a tail for sewing later.
Scarf
- Use vanilla cream yarn and chain 20 stitches for the base.
- Single crochet along both sides of the braid, increasing every last stitch to round off the edges. Leave a tail for assembly.
Arms
- Make a magic circle of 4 stitches with spearmint green yarn.
- Perform a color change to vanilla cream at the first stitch, while increasing.
- Crochet 3 single crochet rounds using vanilla cream, leaving a longer tail for sewing. Make two arms.
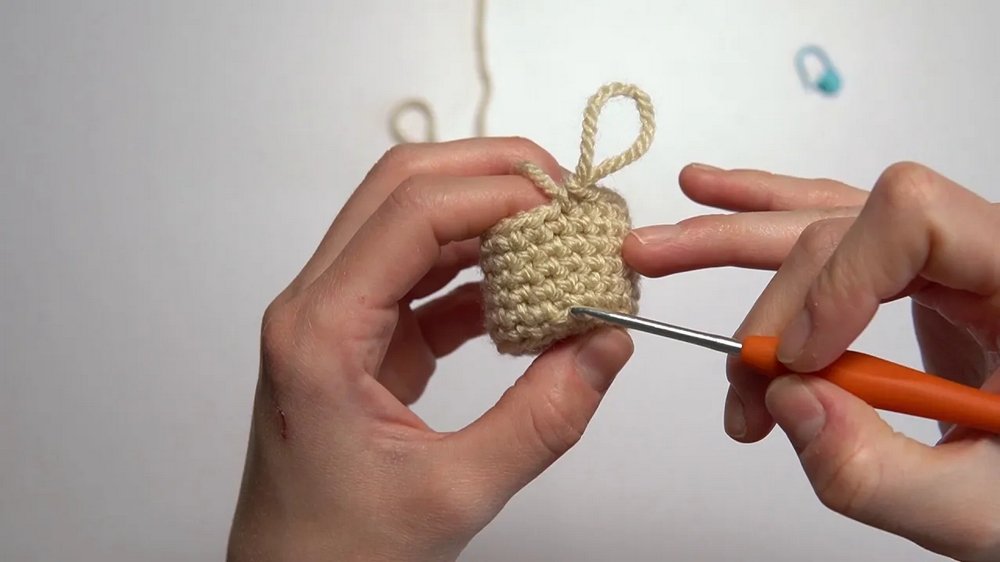
Ears
- Chain 7 with spearmint green yarn.
- Work down the chain:
- Stitch 1: Slip stitch.
- Stitch 2: Single crochet.
- Stitch 3: Half double crochet.
- Stitches 4-6: Double crochet.
- Turn your work and create a second row:
- Half double crochets into the first two stitches.
- Slip stitch into the last stitch.
- Cut the yarn, leaving enough for sewing the ears onto the head. Repeat for the second ear.
Assembly
- Attach the Safety Eyes: Place them 2 rows up on the head, with 3 holes in between. Add backings to secure them.
- Stuff the Head and Body: Ensure firmness while maintaining proper shape.
- Sew the Head to the Body: Secure tightly using an invisible bind-off technique.

- Attach the Ears: Sew each ear securely in place, hiding any tails within the stitches.
- Add the Arms: Use pins to determine placement before sewing them to the sides of the body.
- Sew the Scarf: Wrap it around Baby Yoda’s neck and sew the ends securely together at the back.
- Optional Nose: Stitch a small piece of pistachio green yarn to create Baby Yoda’s nose.
Uses
- A charming display item for shelves or desks.
- A thoughtful, handmade gift for Star Wars fans.
- A cute addition to a nursery or themed room.
Tip
To enhance durability, secure all sewn parts with tight knots and hide the tails within the stuffing or body stitches. This prevents the components from loosening over time.
Conclusion
Completing this Baby Yoda crochet project not only showcases your love for the character but also enhances your skills as a crocheter. With sturdy stitches, creative designs, and thoughtful assembly, rest assured your adorable creation will leave everyone impressed. As a bonus, it’s a wonderful keepsake to cherish for years to come!