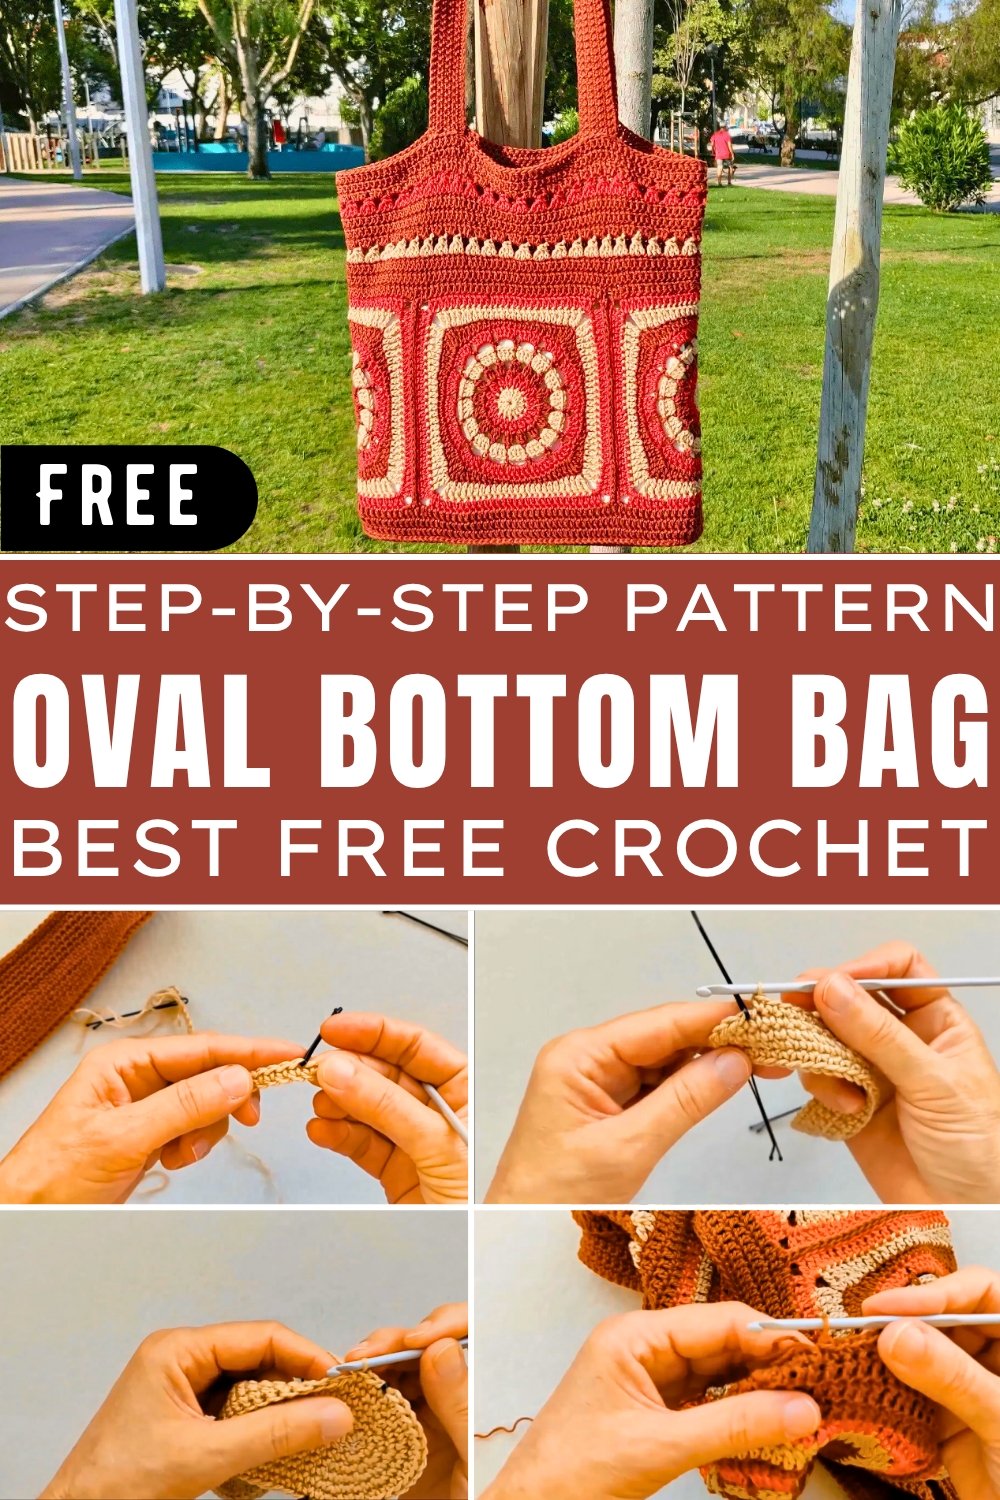
Stunning Crochet Oval Bottom Bag Pattern for Storage & Style
Turn yarn into a stunning crochet oval bottom bag designed for both storage and style—an accessory that’s as practical as it is uniquely fashionable.
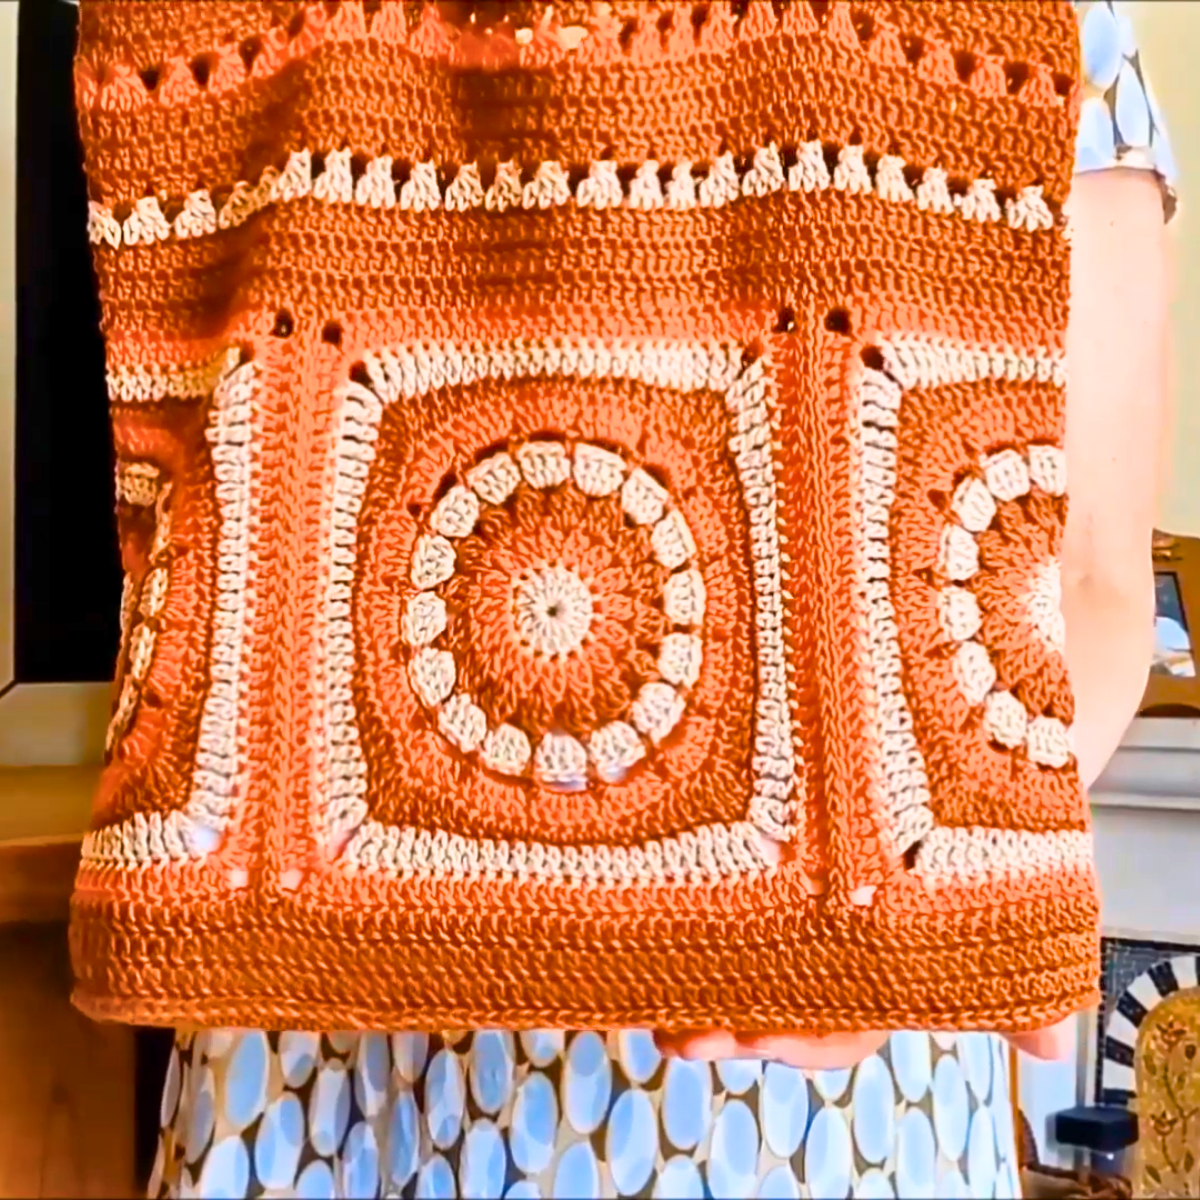
A stylish bag that combines function and beauty is every maker’s dream. The crochet oval bottom bag stands out for its unique shape, offering a sturdy base that provides both practicality and elegance. Perfect for organizing essentials or carrying your belongings in style, this bag is versatile enough for any occasion. Whether you need extra storage for groceries, everyday accessories, or crocheting supplies, this design effortlessly fits the bill.
Unique Crochet Oval Bottom Bag Pattern for Your Wardrobe
Adding to its charm, the oval bottom structure ensures durability and a trendy look that catches the eye. Its design is not only appealing but also exceptionally functional, making it a fantastic option for gifting or personal use. Lightweight yet spacious, it’s ideal for casual outings, home organization, or even as a thoughtful handmade gift for loved ones.
Beyond its practicality, this bag allows endless customization with different colors and yarn types to suit your taste. Its washable and eco-friendly features elevate it as a sustainable choice for daily use. Easy to carry and comfortable to use, the oval bottom makes loading bulky items smoother than ever. With this bag, you’re guaranteed a piece that’s not only practical but also a standout accessory for storage and fashion needs.

Introduction
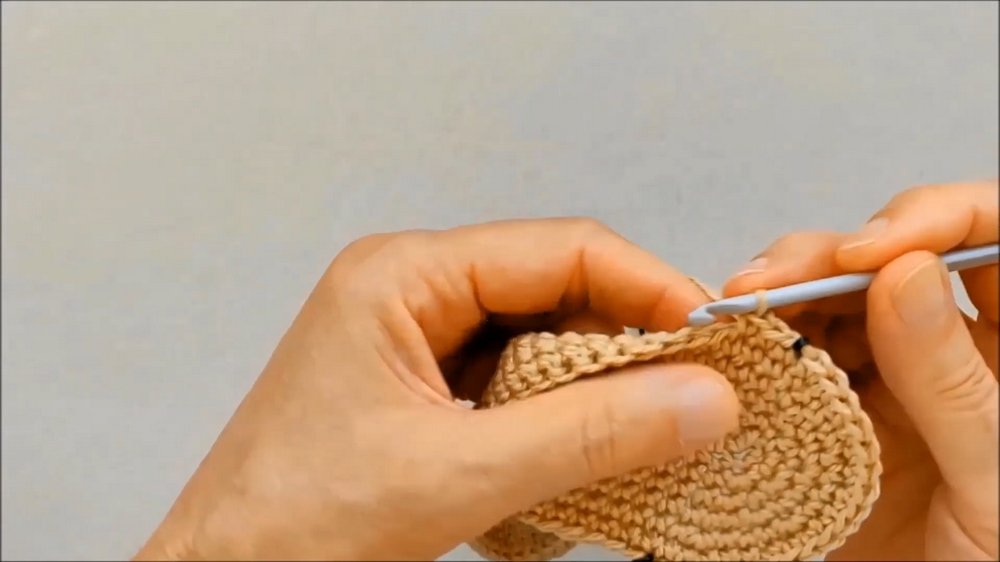
This pattern explains how to create an oval crochet bottom for a bag, covering the step-by-step process of calculating starting chains, creating semi-circles, adding stitch markers, and attaching the base to the bag. It also includes details on reinforcing the bottom with a cardboard insert for durability and maintaining a flat shape, blending both functionality and aesthetics into your crochet project.
Special Features
- Customizable Shape: The oval bottom can be adapted for various bag designs or other projects requiring sturdy bases.
- Use of Stitch Markers: The process integrates markers strategically to minimize mistakes and maintain symmetry.
- Reinforced Base: A cardboard insert is added for strength, keeping the bottom flat over time regardless of weight.
- Various Levels of Detail: The tutorial includes advanced techniques like invisible joins for clean finishes and glue usage for reinforcement.
Materials Needed
- Yarn (specific details not provided, but should match your project’s bag requirement).
- Crochet hook (appropriate size for your chosen yarn).
- Stitch Markers (bobby pins or standard markers).
- Cardboard (1–3 layers, depending on bag weight and thickness).
- White glue (or any preferred adhesive for reinforcing the cardboard).
- Felt, fabric, cardstock, or contact paper for finishing the cardboard base.
- Scissors and needle for weaving ends and creating the invisible join.
Sequence of Steps
1. Calculate Starting Chain:
- Begin with 50 chains, and skip the first one.
- Work single crochet stitches until the end.
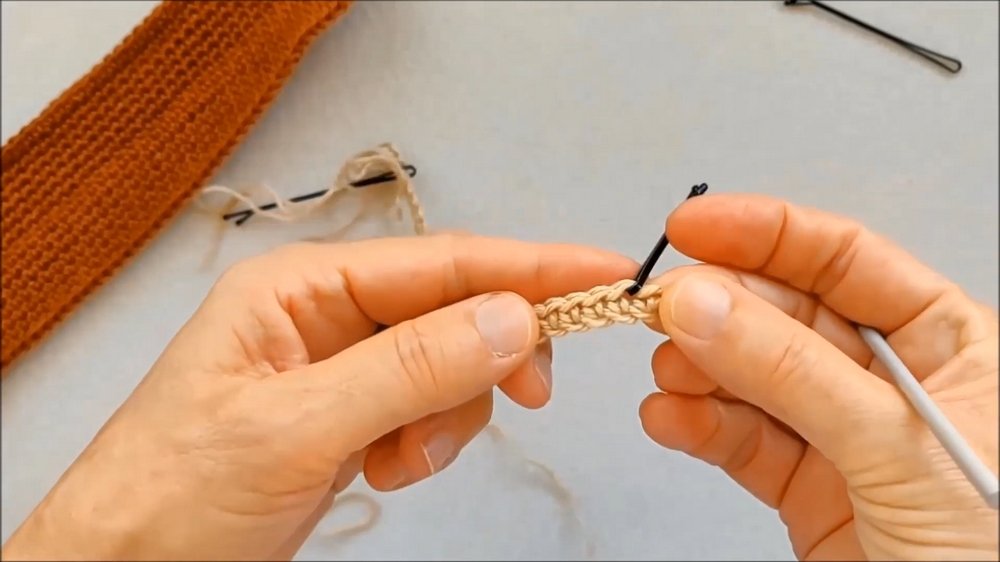
2. Add Stitch Markers:
- Place markers at strategic points: the first and last single crochet of each semi-circle, as explained in detail during the tutorial.
- Markers ensure that sides and curves are symmetrically aligned.
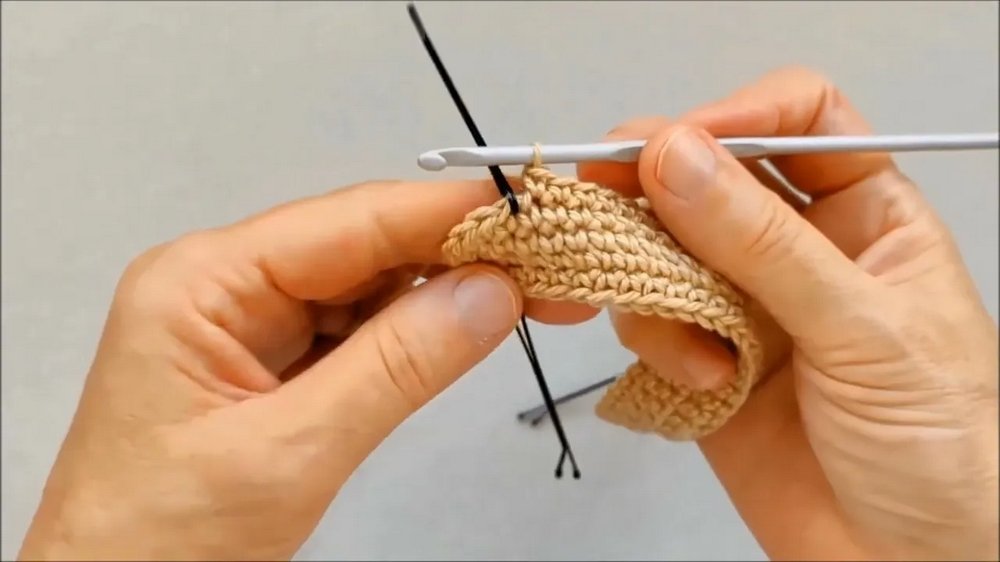
3. Create Semi-Circles (Multiple Rows):
- Follow distinct row-by-row patterns as provided:
- Row 1: Place additional single crochets in the last stitch to start the semi-circle.
- Row 2: Add increases in the semi-circle stitches while working single crochets along the sides.
- Row 3 Onward: Use varying sequences for semi-circle shaping: e.g., increase + single crochets (row-specific sequences from the video).
- Repeat this process until achieving the desired size for the bag bottom.
4. Reinforce the Base with Cardboard:
- Draw the bottom shape on paper, and cut slightly smaller than the crochet bottom.
- Transfer the shape to cardboard and glue multiple layers together based on weight and durability needs.
- Use felt or fabric to cover the cardboard for a polished finish.
5. Attach Crochet Bottom to Bag:
- Align the oval bottom with your bag’s opening, ensuring the wrong side faces down.
- Use single crochet stitches to attach the bottom to the bag. Ensure loops are tight and symmetrical.

6. Check for Stitch Count Accuracy:
- Before attaching, count the number of stitches to ensure alignment. In the example, 136 stitches were used in total.
7. Invisible Join:
- Use scissors and a needle to finish the row with an invisible join for a seamless look.
Tutor’s Suggestions
- Avoid Skipping Stitches Near Curves: Pay extra attention to avoid symmetry issues.
- Use Double-Sided Tape (Optional): Add tape to the cardboard base for secure placement within the bag.
- Adjust for Other Designs: The same method can be adapted for other bag styles or bottom shapes.
- Count Stitches Carefully: Ensuring an even stitch count is critical for clean attachment and overall aesthetics.
- Consider Weight and Thickness: Adapt the number of cardboard layers based on typical use of the bag and weight carried.
Uses
- Bag Designs: The oval bottom is perfect for crafting handbags, totes, or any other crochet bag requiring a durable and flat base.
- Other Projects: The technique can be adapted for baskets, bowls, or flat-bottomed items.
Difficulty Level
- Skill Level: Intermediate
The technique requires more precision compared to beginner projects, especially with handling stitch markers, increases, and invisible joins. However, the instructions provided in the video make it accessible to anyone willing to follow step-by-step guidance.
Tip
Before attaching the crochet bottom to the bag, ensure both pieces are aligned correctly with matching stitch counts. This will prevent uneven sides and simplify the attachment process.
Conclusion
The pattern offers a comprehensive guide to crocheting an oval crochet bottom for bags, combining practicality and customization. With attention to detail and tips from the tutor, this project is suitable for those looking to enhance their intermediate crochet skills while creating functional, professional-looking items.