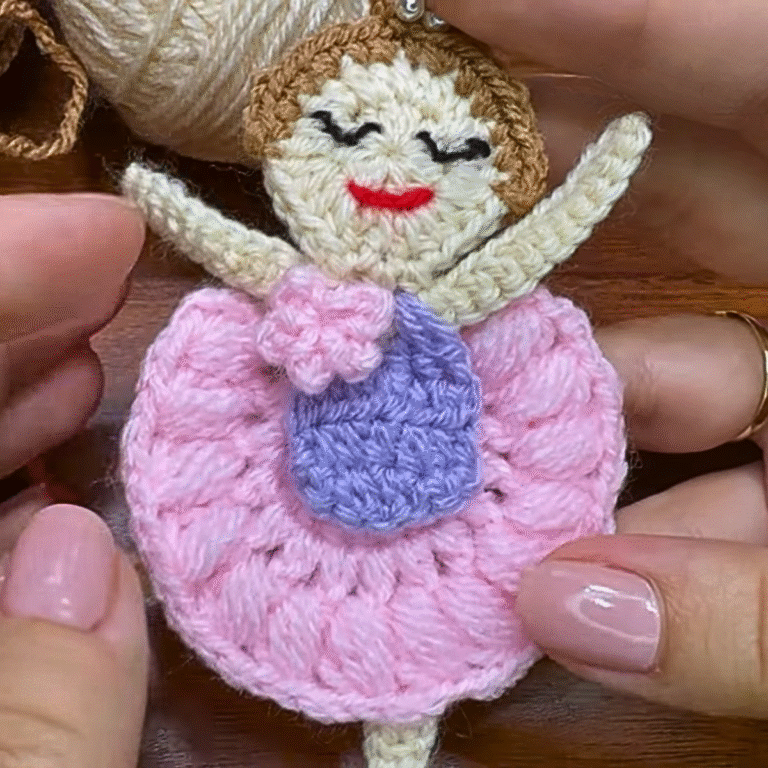
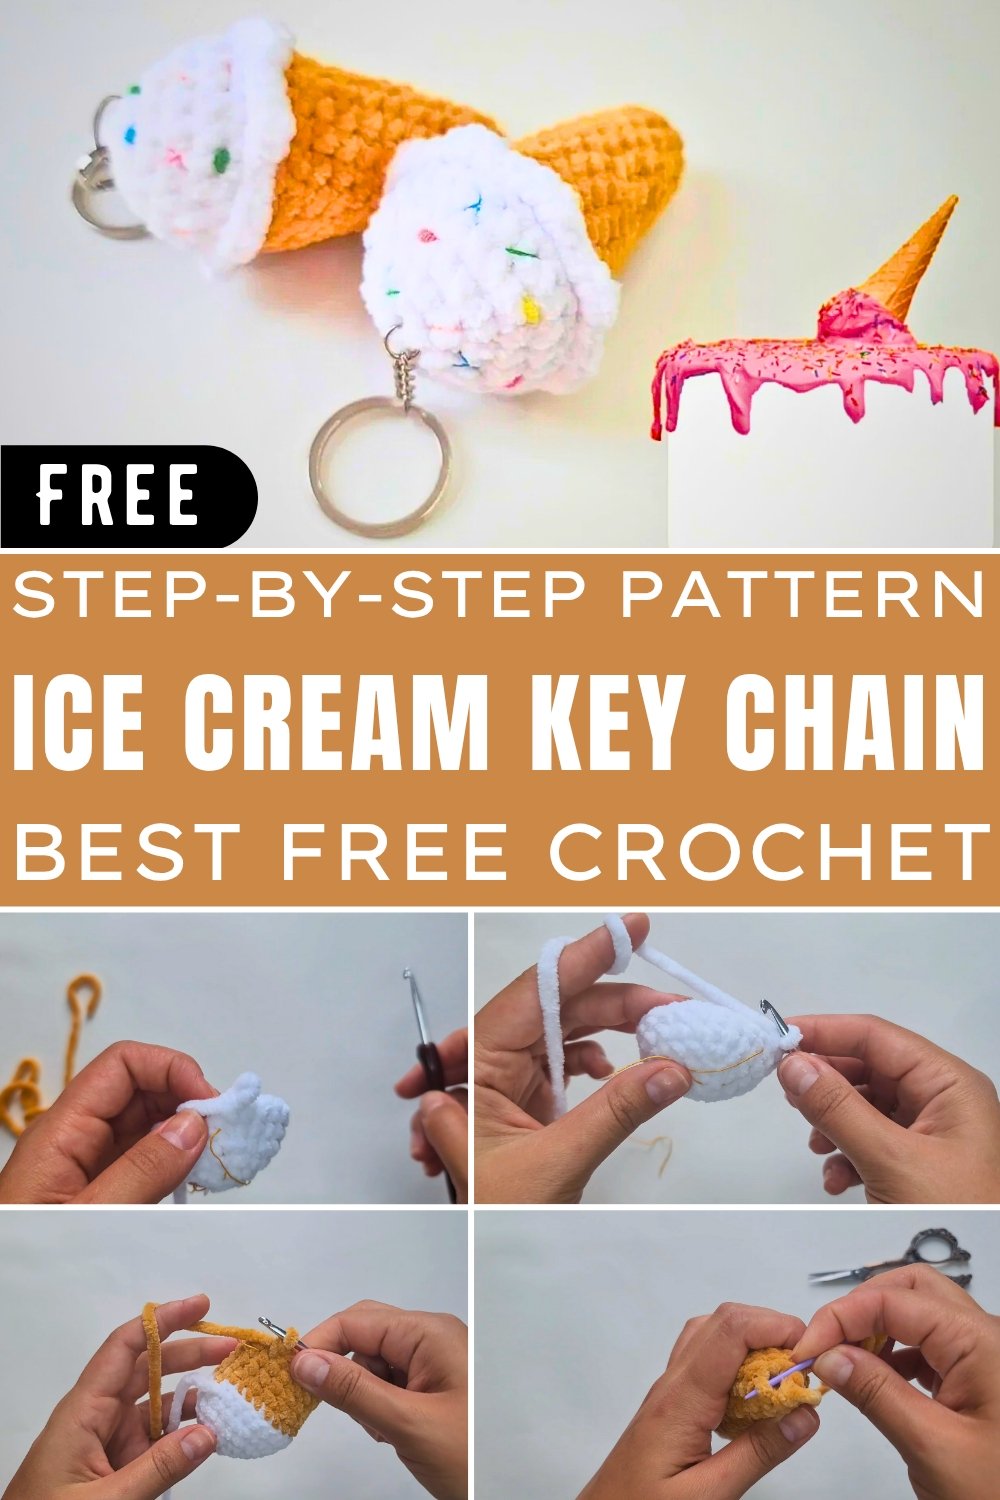
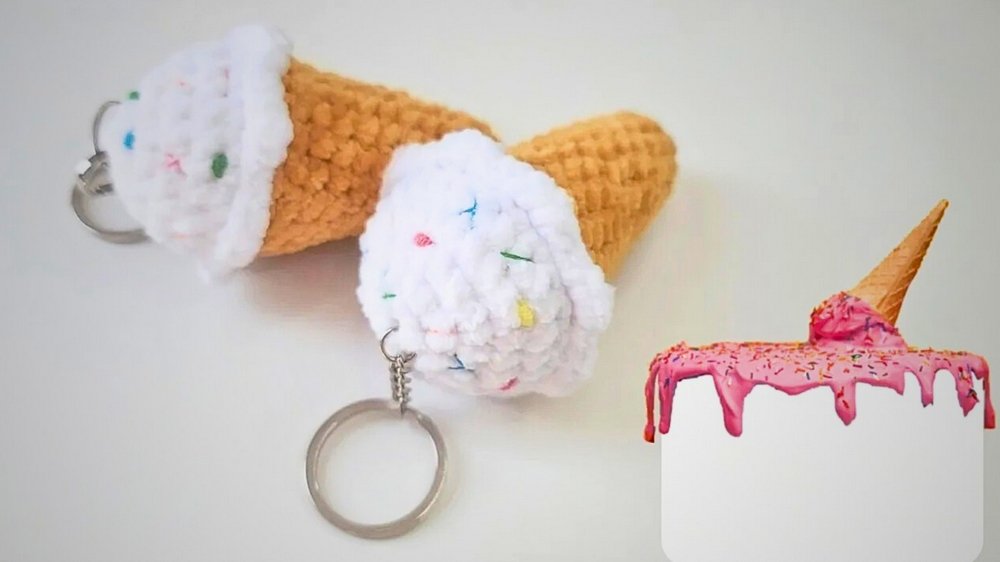
Best Amigurumi Crochet Ice Cream Keychains Pattern for Gift
Whip up whimsy with our Crochet Ice Cream Keychains Amigurumi Pattern – a charming accessory perfect for adding sweetness to your everyday essentials.
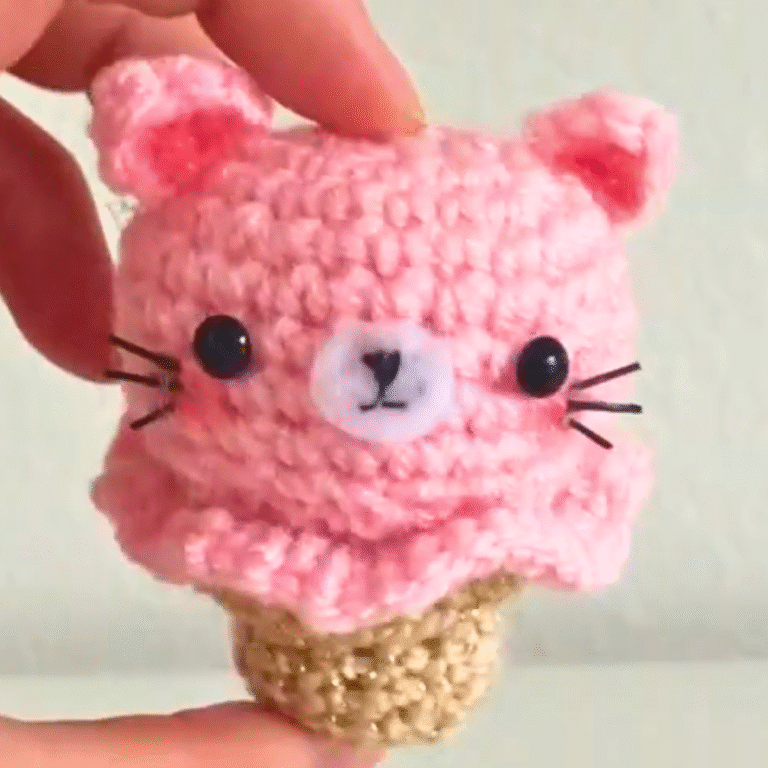
Delight your senses with an adorable project that brings ice cream to life in a playful and artistic way. Perfectly miniature, these crochet Ice Cream Keychains make amazing everyday accessories, gifting ideas, or decor for bags and backpacks. They combine the charm of handmade artistry with functionality and a hint of sweetness, making them hard to resist.
How to Crochet Ice Cream Keychains – Cute Amigurumi
Their versatility goes beyond aesthetics these key chains offer a joyful, lightweight, and durable solution for organizing keys. They also serve as thoughtful, unique gifts for birthdays, holidays, or just as a sweet gesture for someone close to your heart. Whether as party favors or small, colorful keepsakes, their cheerful and quirky design is sure to put smiles on faces.
This crochet project takes the joy of simple shapes and turns it into an ice cream-inspired masterpiece with detailed stitching, playful textures, and vibrant color combinations. Quick to make and customizable to suit your favorite ice cream flavor, the process allows for endless creativity. It’s the ideal small-scale DIY for beginners as well as advanced crocheters who love working with amigurumi techniques.
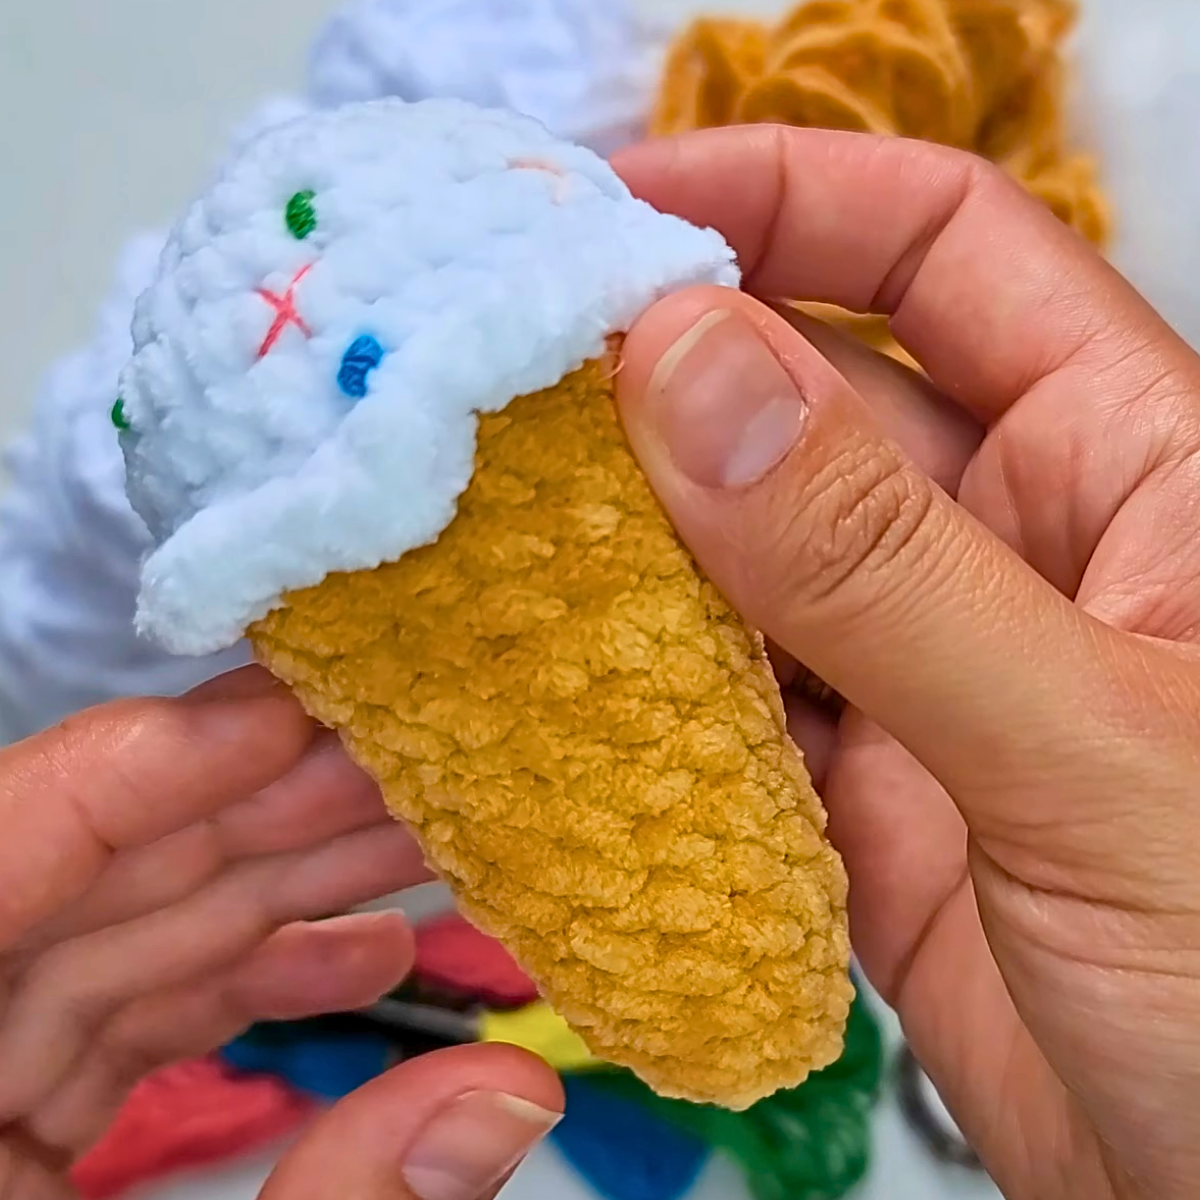
Step-by-Step Crochet Ice Cream Keychain
This pattern walks you through creating a delightful ice cream-shaped keychain charm. Perfect for beginners, this quick project can be completed in just half an hour using minimal materials. The finished product serves as a decorative keychain, a fun handmade gift, or a playful bag charm. With easy-to-follow instructions and tips to enhance your skills, this pattern is designed to encourage creativity while sharing crochet techniques.
Materials Needed
- Blush Yarn (2 colors): Minimal amount to form the ice cream scoop.
- 4.5 mm Crochet Hook: Adjust size according to your chosen yarn if different.
- Fiber Fill: For stuffing the ice cream.
- Embroidery Floss & Sewing Needle: Used for detailed decoration on the ice cream.
- Plastic Needle: To weave in yarn tails securely.
- Scissors: For cutting yarn and threads.
- Keychain Base & Pliers: Needed to attach the finished keychain.
- Stitch Marker: You may use contrasting thread or markers for tracking.
Special Features
- Quick and easy project: Takes only 30 minutes.
- Beginner-friendly with clear techniques for shaping and decorating.
- Recycles leftover yarn scraps, making it economical and sustainable.
- Versatile use: Can be personalized with different decorations (bows, beads, etc.) or used as a bag charm/keychain.
Step-by-Step Instructions
1. Start with the Ice Cream Scoop
- Begin with two chain stitches, making it an alternative to the magic circle.
- Crochet six single crochet stitches into the first chain, forming the first round.
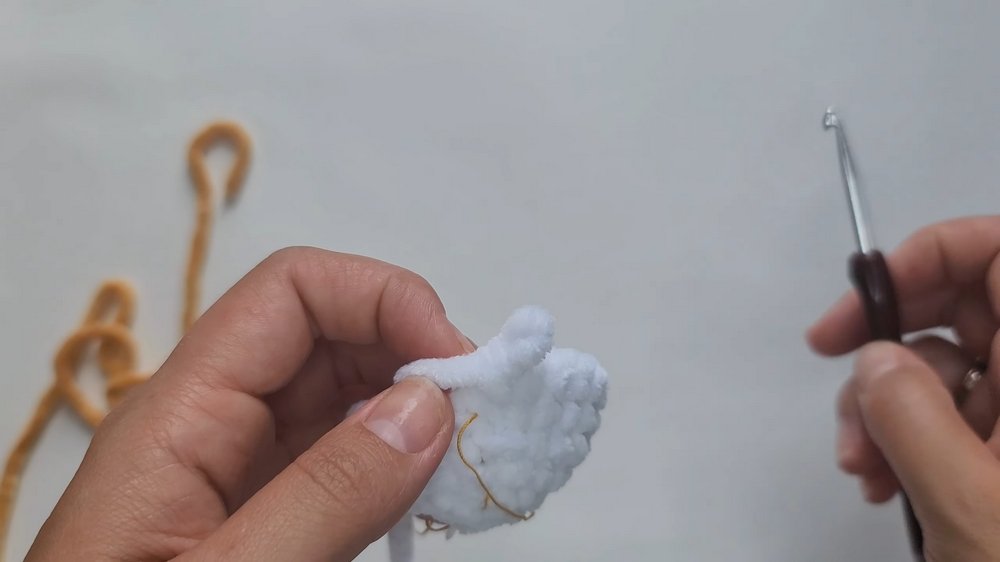
- Expand by making six increases (two single crochet stitches in each stitch). Continue expanding:
- Round 3: Alternate single crochet and increase.
- Round 4: Two single crochets, then increase.
- Crochet two even rounds to maintain the shape.
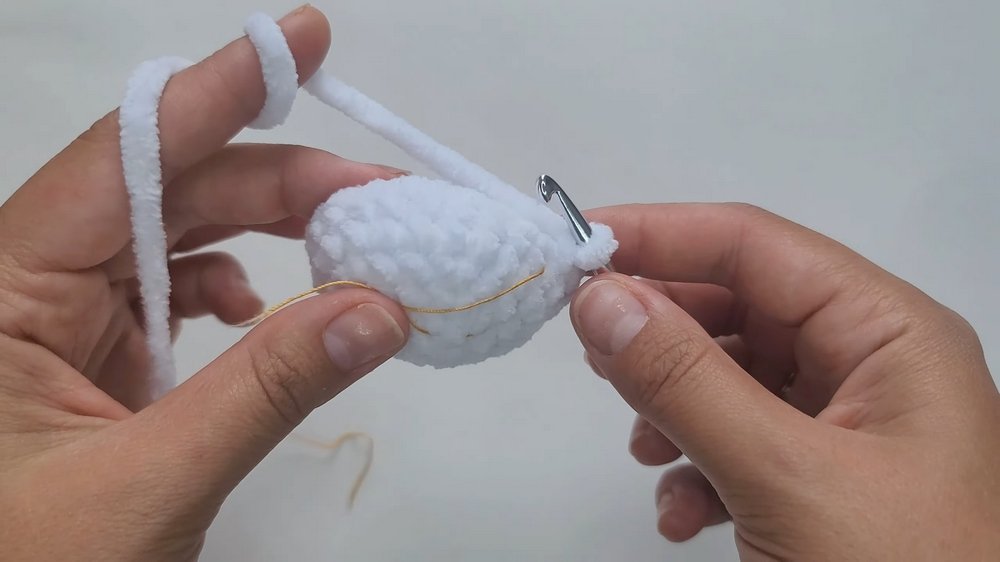
2. Change Color and Create Texture
- In Round 6, change color with the last stitch of the round.
- Crochet back loops only to create texture at the edge.
- Begin decreasing after Round 6:
- Round 7: Two single crochets followed by a decrease, repeated six times.
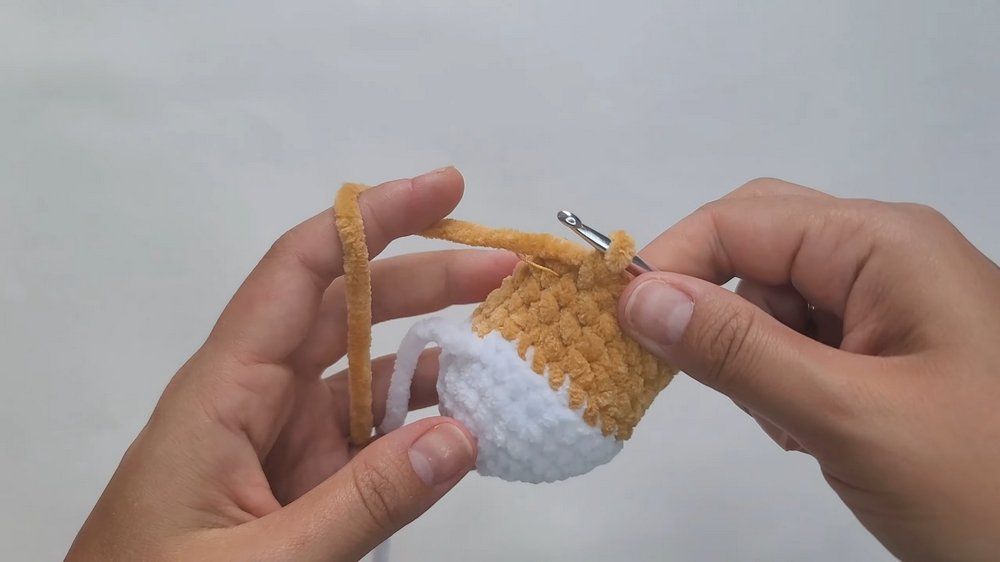
3. Add Volume
- Continue rounds with decreases to shape the scoop.
- Round 9: Four single crochets followed by a decrease.
- Round 13: Three single crochets followed by a decrease.
- After Round 16, add fiber filling to give structure to the ice cream scoop.
4. Finish the Scoop
- Make final decreases and close off the hole using a plastic needle. Weave in the tail securely.

5. Decorate the Ice Cream
- Use the front loops you saved earlier and create decorative edges:
- Pull thread through the loop. Crochet a slip stitch followed by three single crochets.
- Repeat steps until completing the round.
6. Add Fine Details
- Use embroidery floss to add patterns or decorations. You can use different sewing techniques or embellishments like beads or bows.
7. Attach the Keychain Base
- Using pliers, attach the keychain ring to the ice cream through the base. Secure the ring tightly to prevent it from slipping off.
Tutor’s Suggestions
- If you find the stitches challenging, watch the previous tutorial from DD Toys Channel. It covers basic crochet techniques to provide further clarity.
- Take time to arrange fiber filling properly to ensure the ice cream retains its shape.
- For decorating, experiment with colors and patterns to make your charm unique.
Level of Difficulty
This project is beginner-friendly and recommended for those looking to improve their crochet skills. The simple structure and step-by-step guidance make it accessible, even for those relatively new to crocheting.
Uses and Benefits
- Functional: Serves as a keychain or decorative bag charm.
- Creative: Allows for personalization through decorations.
- Relaxing: A quick project that helps reduce stress while improving fine motor skills.
- Eco-Friendly: Uses yarn scraps and small amounts of materials.
Tip
To ensure neat edges, always crochet slowly in the back loops and secure all yarn tails properly. This prevents unraveling and keeps your design clean.
Conclusion
The Crochet Ice Cream Keychain charm is quick, adorable, and beginner-friendly, making it a fun addition to your handmade craft collection. With simple materials and minimal time investment, this project can beautifully showcase your creativity while serving practical purposes like accessorizing keys or bags.