Bright and Beautiful Crochet Granny Square Pattern in No Time
Build beautiful and versatile crochet granny square effortlessly with this beginner-friendly guide, perfect for creating blankets, bags, and more!
Tiny yet impactful, crochet granny squares revolutionized the way we think about handmade designs. What began as simple building blocks for blankets has now evolved into a limitless medium for personal expression. These small squares, worked in a variety of colors and patterns, can effortlessly transform into clothing, accessories, and even home décor items.
Timeless Crochet Granny Square Patterns You’ll Love

One of their greatest strengths lies in their accessibility. They are easy enough for beginners to try, yet offer endless opportunities for experienced hands to experiment with complex designs and vibrant hues. Granny squares also champion sustainability by making excellent use of leftover yarn, turning scraps into something functional and beautiful. Their portable size allows for flexibility, making them ideal for crafters with busy, on-the-go lifestyles.
Whether stitched into oversized cardigans, used to design unique bags, or pieced together into cozy throws, granny squares bring warmth, creativity, and personality to their final form. Durable yet lightweight, they are as practical as they are decorative. Crochet granny squares have grown far beyond their traditional roots, standing today as testaments to timeless design and endless innovation in the world of handmade crafts.
Introduction:
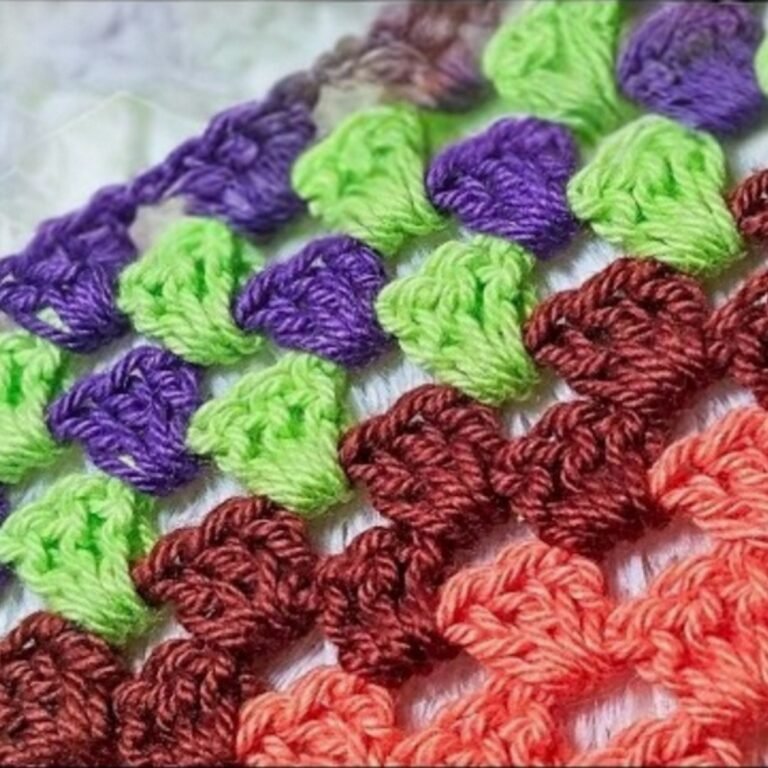
Crochet granny squares are versatile motifs that can be used to create a variety of projects such as bags, sweaters, and blankets. This pattern will guide you through creating a basic granny square using half double crochets.
Materials Needed:
- 5 mm Crochet Hook: Any standard hook will do.
- Scissors: Used for trimming yarn ends.
- Darning Needle: For sewing in yarn ends.
- Yarn: Worsted weight acrylic is recommended, but any yarn will work depending on your desired square size.

Step-by-Step Instructions
Step 1: Starting with a Slip Knot
- Make a Slip Knot: Wrap the yarn around your fingers, pull through the loop, and adjust to create a slip knot.
- Insert Hook: Place your hook so the working yarn is on the left and the tail is on the right.

Step 2: Creating the Foundation Chain
- Chain Four: Yarn over and pull through to make four chains.
- Join to form a loop: Insert hook into the first chain to form a loop. Yarn over and pull through both loops to create a circle.

Step 3: First Row Construction
- Chain Two: Yarn over and pull through twice for setup.
- Half Double Crochet Cluster:
- Yarn over, insert hook into the circle, pull through.
- Yarn over and pull through all three loops.
- Repeat this twice more to complete a cluster of three.
- Create Corner with Chain Three: Yarn over and pull through three times.
- Repeat: Make three more clusters separated by corners of chain threes, totaling four clusters.

Step 4: Second Row Construction
- Chain Three to Start: Yarn over and pull through three times.
- Cluster in Corner: Make three half double crochets, chain three, then three more into the same corner.
- Chain One between Clusters: This separates corner clusters.
- Repeat for All Corners: Continue around for four corners in total.

Step 5: Third Row Construction
- Chain Two to Start: Provides height for the row.
- Two Half Double Crochets in First Space: Chain two acts as the third in cluster.
- Cluster in Each Space: Chain one between clusters, corner clusters are made as before with chain threes.
- Continue for desired size: Repeat this row pattern to increase the granny square size.
Conclusion
Your granny square is complete, with endless possibilities for customization by adding more rows. Gradually, as additional rows are built, the granny square will expand in size. Carefully weave in your yarn ends for a neat finish.