Lace Edged Crochet Rectangular Rug Pattern for Any Room
Build a stunning lace-edged crochet rectangular rug with this elegant pattern perfect for adding charm and warmth to any room in your home.
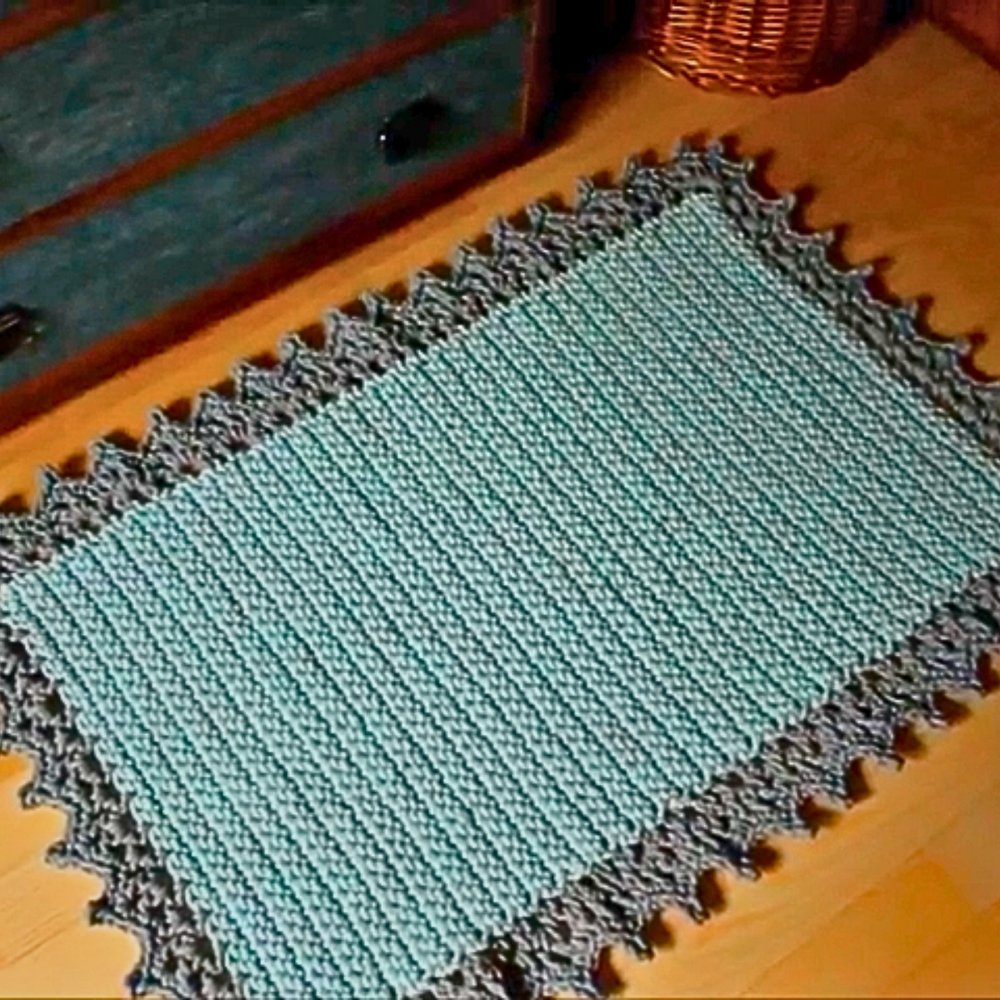
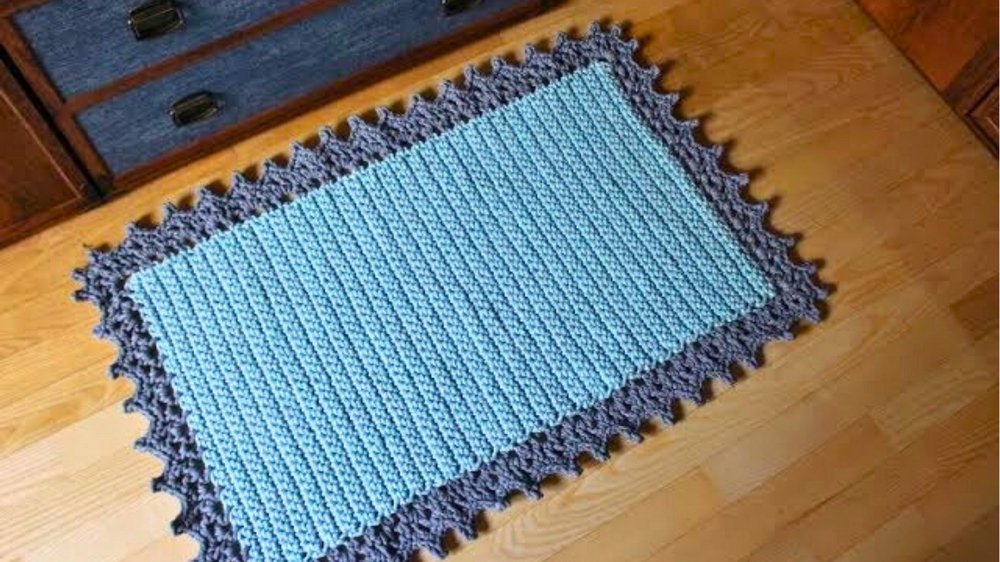
A carefully designed crochet rug can transform a simple space into something extraordinary. This lace-edged crochet rectangular rug pattern brings both style and functionality to any room. With intricate lace detailing, it’s perfect for enhancing the decor of living rooms, bedrooms, or cozy reading corners. The rectangular shape makes it versatile for use as an area rug or under furniture, allowing it to fit effortlessly in most spaces.
Lace Edged Crochet Rug Pattern for a Touch of Refinement
This pattern is easy to follow and suitable for both beginners and experienced crocheters looking for a rewarding project. The lace edging adds a lovely decorative touch, giving the rug a timeless appeal. Beyond aesthetics, crocheted rugs provide a warm, tactile surface, making them great for softer flooring options.
They’re also durable and customizable, allowing you to experiment with colors and sizes to match your personal style. This rug isn’t just decoration; it’s a practical addition that helps protect flooring while giving rooms a cozy, inviting feel. With this pattern, you can bring a touch of handmade charm to your home, one loop at a time.
Introduction:
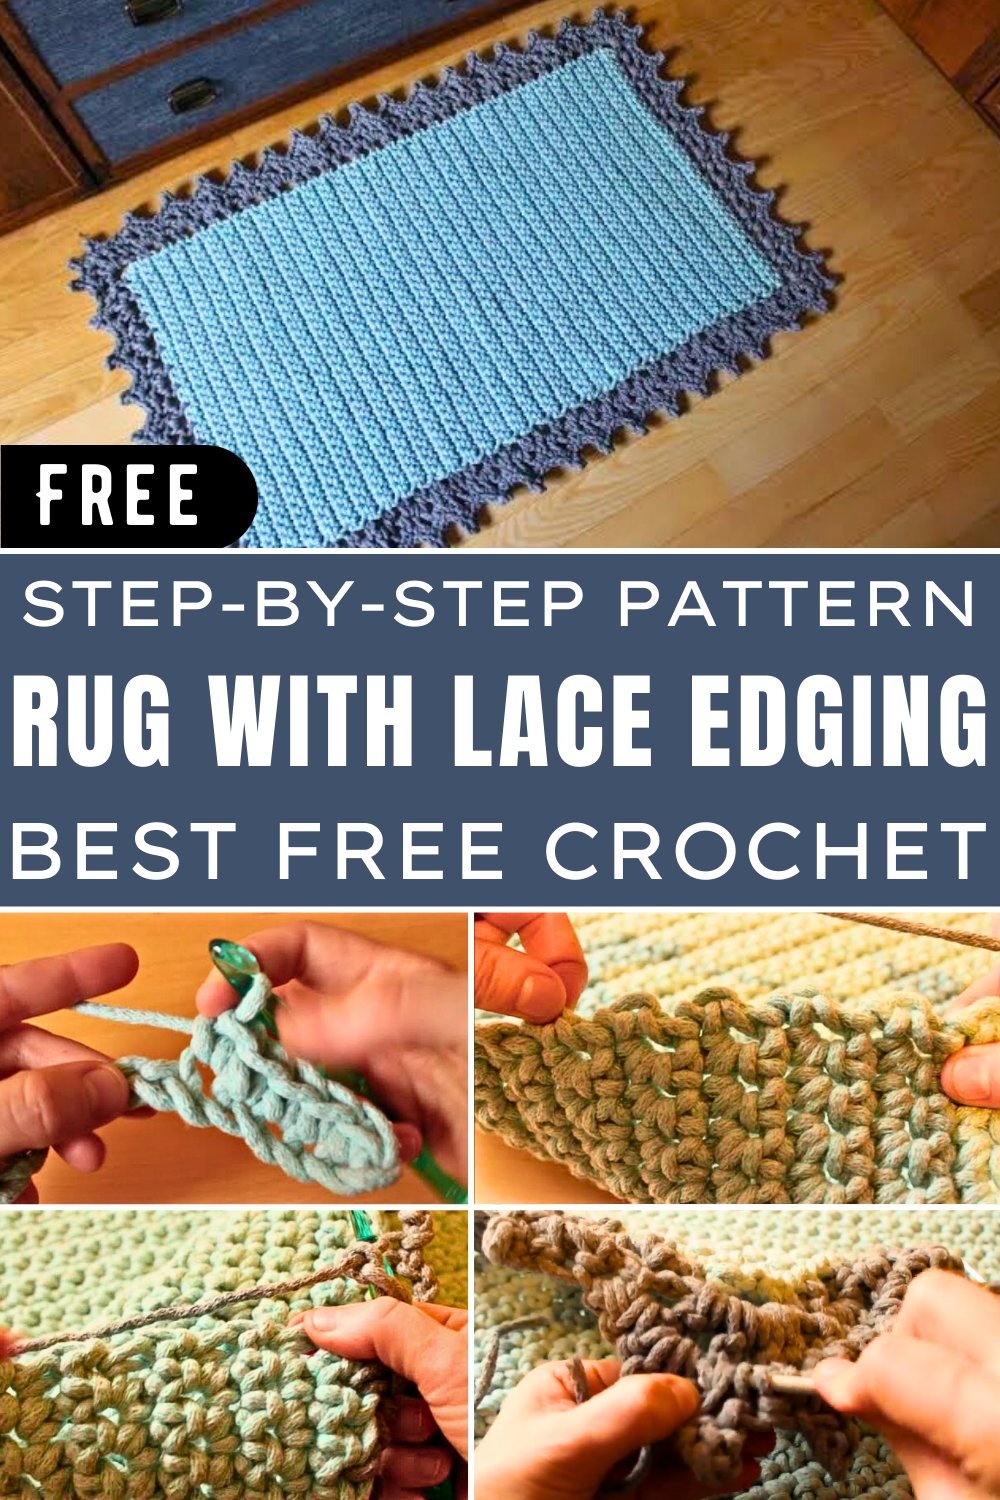
This step-by-step guide outlines every part of the process to crochet a stunning rectangular rug with lace edging. Using simple stitches, this project combines functionality with intricate lace details, resulting in a beautifully finished rug suitable for various spaces. Perfect for beginners and seasoned crocheters, the pattern ensures both ease and elegance in execution.
Materials Needed
- Crochet Hook: 10 mm
- Cotton Cord:
- Gray mint color – 300 meters
- Dark gray color – 120 meters
Rug Size:
- Without lace edging: 50 cm x 85 cm
- With lace edging: 65 cm x 100 cm
Step-by-Step Instructions
1: Creating the Base Rug Using Single Crochet Stitches
- Determine the Starting Chain:
Before beginning, calculate the number of chain stitches and rows to match the lace edging motifs. The starting chain should be a multiple of 4 plus 6, and the number of rows should be a multiple of 4 plus 5 rows. - Make the Starting Chain:
- In this pattern, the example base begins with 34 chain stitches.
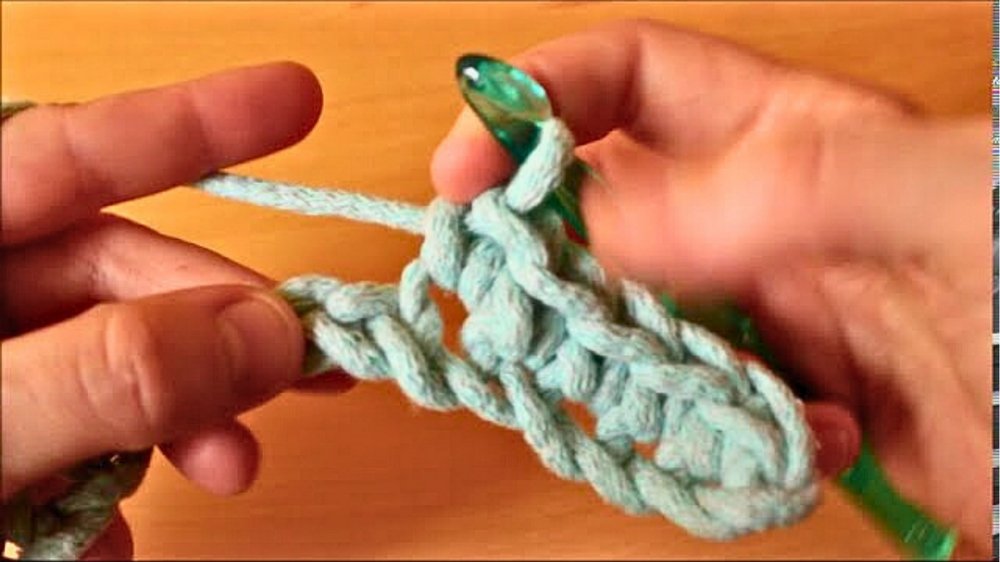
- Begin Row 1:
- Skip the first chain stitch and start crocheting into the second chain stitch.
- Make 33 single crochet stitches in the row.
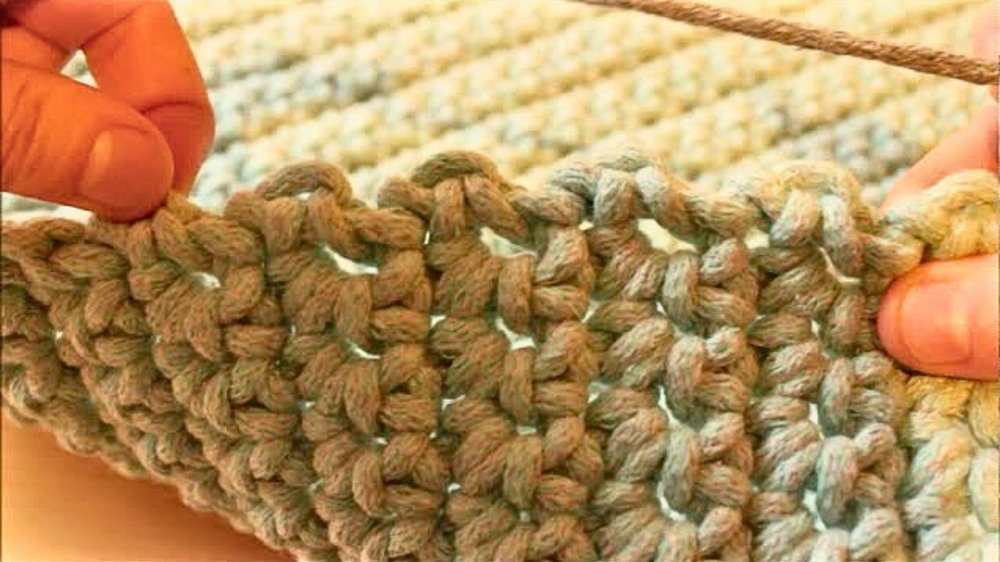
- Continue Additional Rows:
- For subsequent rows, chain 1, turn the work, and make single crochet stitches across the row (ensuring the stitch count remains consistent at 33).
- Avoid crocheting into the side chain stitch at the end of each row to maintain consistent dimensions and prevent the rug from deforming.
- Complete the Base Rug:
- Crochet 65 rows (rows must be a multiple of 4 plus 5).
- Once finished, cut the cord and make a secure slip stitch.
- Hide the end of the cord in the stitches using a smaller crochet hook.
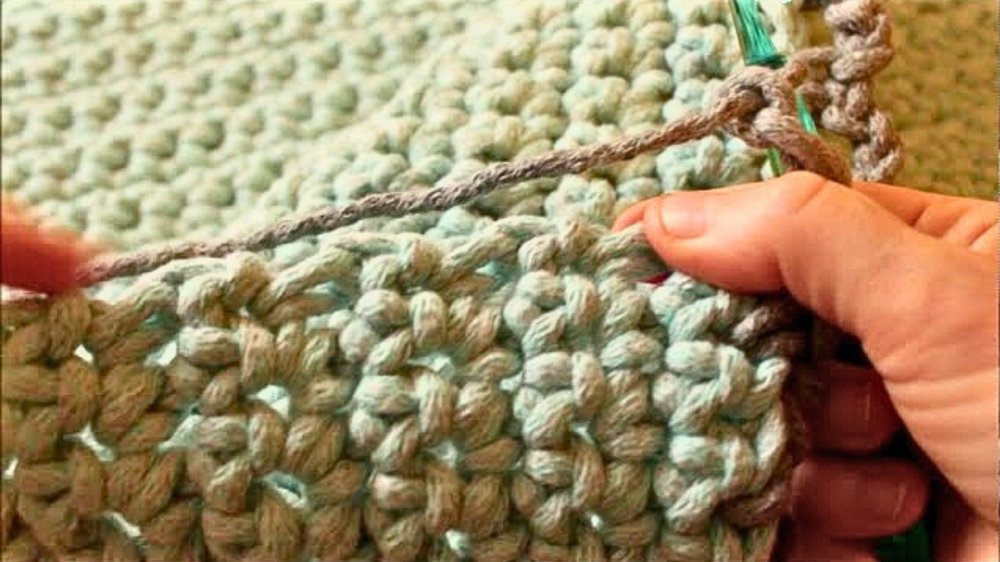
2: Adding the Lace Edging
- Start the Lace Edging:
- Switch to a different color of cotton cord (dark gray in the video).
- Begin in the second stitch of the last row of the base rug.
- Chain Stitches to Create Spaces:
- Chain 4; skip 1 stitch and make a single crochet in the next stitch.
- Continue chaining 3, skipping 1 stitch, and making a single crochet in the next stitch until you form 15 chain spaces along one side.
- Working Around the Corners:
- For corners, chain 4, skip the last stitch, and make a single crochet in the first stitch of the next side.
- Repeat the pattern along all sides of the rug, ensuring smooth transitions at the corners.
- Count the Chain Spaces:
- Each long side should have 31 chain spaces (excluding corner spaces).
- Each short side should have 15 chain spaces (excluding corner spaces).
3: Enhancing the Lace Edging Design
- Adding Double Crochet Stitches:
- In each chain space, work the following stitches:
- Chain 1
- Make 1 double crochet, then chain 2 and make another double crochet into the same chain space.
- Chain 1 and finish with a single crochet into the next chain space.
- Repeat this pattern across all chain spaces.
- In each chain space, work the following stitches:
- Working in Corner Chain Spaces:
- For corners, add detailed stitching:
- In the corner chain space: Chain 1, make 4 double crochets, and chain 1 between each double crochet.
- For corners, add detailed stitching:
- Repeat for All Sides and Corners:
- Follow the stitching sequence around the entire rug, ensuring symmetrical lace edging.
4: Finishing the Lace Edging
- Create an Additional Row (optional):
- In each chain space, add single crochet stitches to solidify the lace edging.
- For decorative touches, chain 3, slip stitch into the 3rd chain, and continue single crochet stitching for added texture.
- Corner Decoration:
- In corner chain spaces, repeat the lace pattern three times for a polished look.
- Finish Off the Edging:
- Slip stitch into the first single crochet to complete the work.
Conclusion
This rectangular crochet rug with lace edging is a project that beautifully combines simplicity and elegance. The base rug is created using straightforward single crochet stitches, while the lace edging adds intricate detail and texture. Perfect as a decorative or functional piece in your home, this rug is customizable in size and color, allowing for endless creative possibilities.