Sweet Crochet Kitty Ice Cream Amigurumi for Animal Lovers
Delight animal lovers with our Crochet Kitty Ice Cream Amigurumi—a charming handmade treat blending adorable cats and whimsical ice cream fun.
Who knew the realm of fluffy kittens and icy sweet treats could come together in such a delightful creation? The Sweet Crochet Kitty Ice Cream Amigurumi is more than just an adorable design, it’s a symbol of joy and creativity for animal lovers of all ages. With every thoughtful stitch, this charming piece radiates warmth, making it perfect for brightening up your home or gifting someone special. Ideal as a unique decorative item, a playful photo prop, or even a heartfelt collectible, it adds a touch of whimsy to any environment.
Super Cute Crochet Kitty Ice Cream Amigurumi Pattern

Soft textures and intricate details make it irresistible while offering a soothing tactile experience, providing comfort and relaxation in a busy day. Children adore its playful design, while adults appreciate its fine artistry, ensuring it’s cherished by all generations. A gift like no other, it effortlessly turns moments into memories and spaces into celebrations of creativity.
Compact and portable, this amigurumi lets you carry a little happiness wherever you go. It’s not just a crochet creation—it’s a piece of personality that wins hearts and sparks conversations. For animal lovers, this handcrafted treasure is the ultimate way to celebrate love for pets and sweet moments alike.
How to Crochet Adorable Kitty Ice Cream Cones: Step-by-Step Details
Introduction
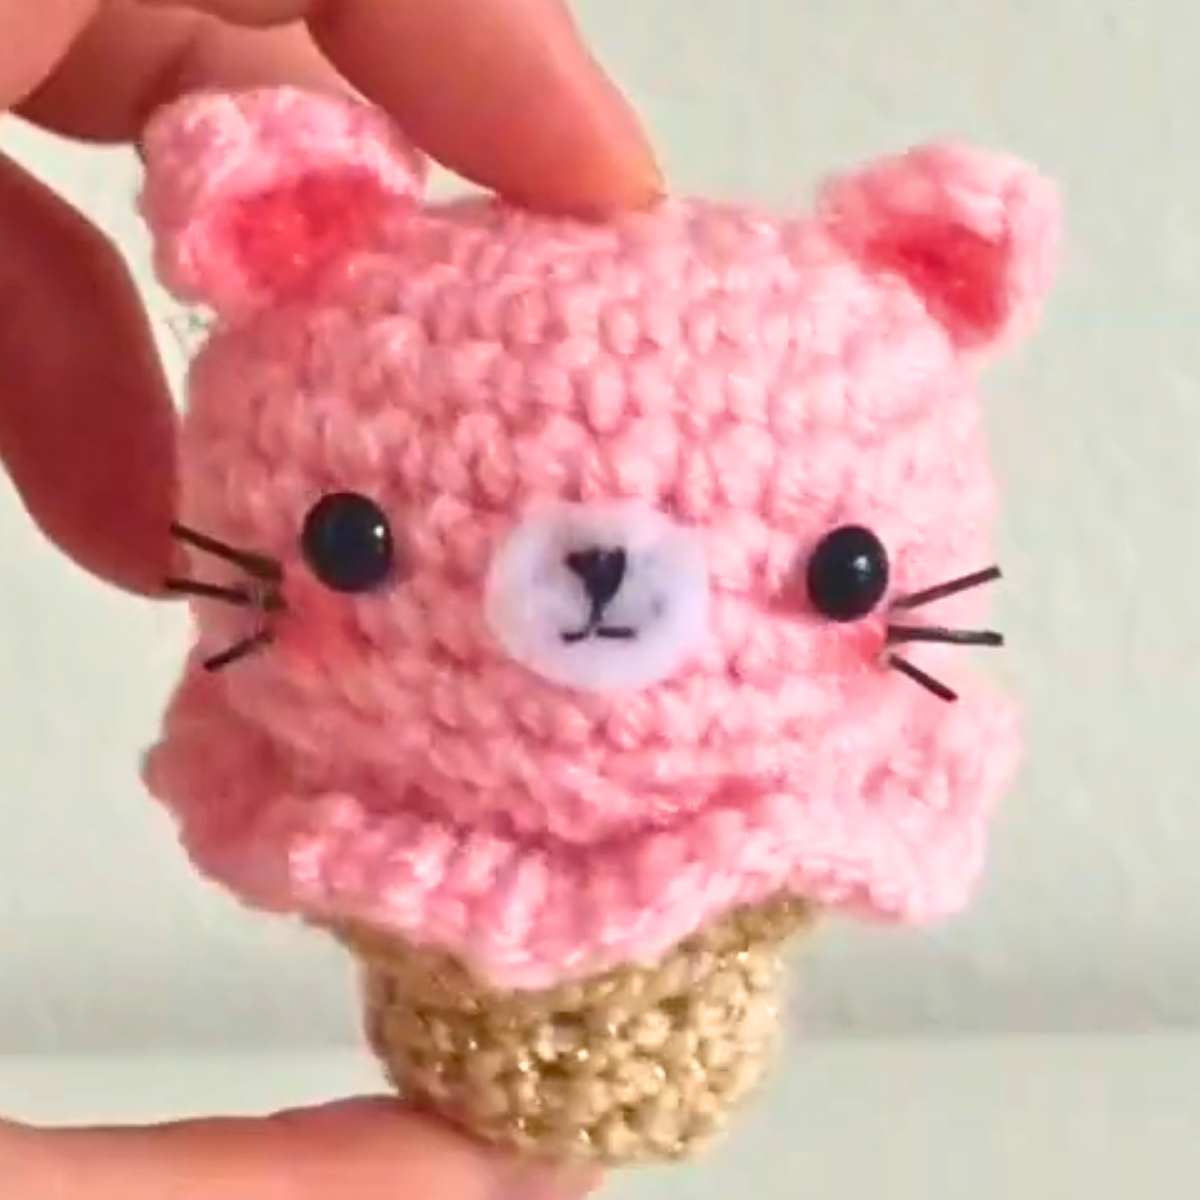
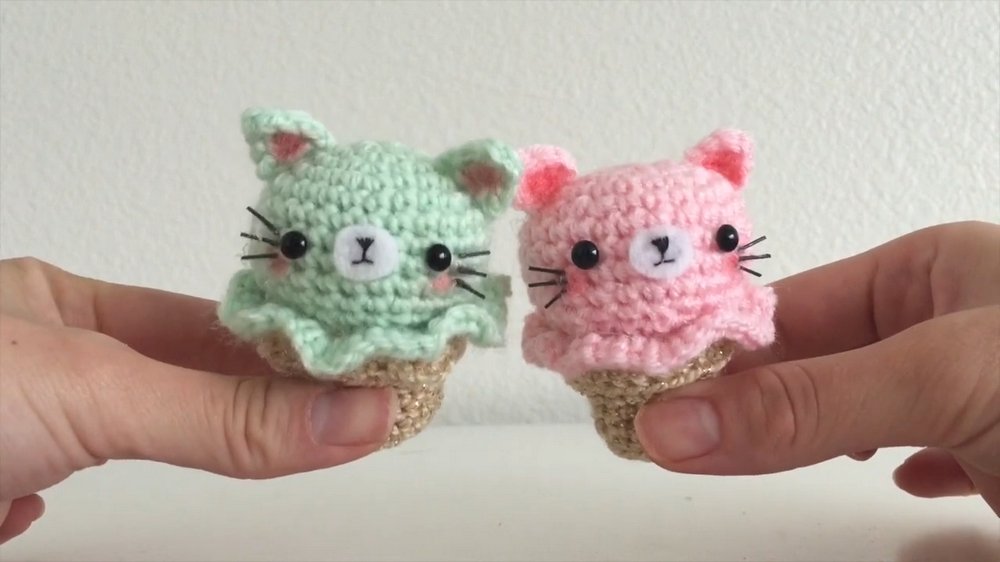
These mini creations feature a soft-serve top with cat ears and a short, stubby cone, making them ideal as decorative items, gifts, or collectibles. With detailed descriptions, Creator ensures that both beginners and experienced crocheters can follow along.
Step 1: Materials Needed
- Crochet Hook: Moo uses a 2.75 mm crochet hook but advises that any similar size will work.
- Yarn: Choose yarn in the color(s) of your choice for the ice cream and cone. Pink is used for the ice cream topping in the video.
- Stuffing: For creating a rounded, soft texture.
- Optional Materials: Hot glue gun, animal eyes, felt, sewing string, blush (from a makeup palette).
Step by Step Instructions
Step 2: Making the Ice Cream Ball
- Start with a slip knot on the crochet needle.
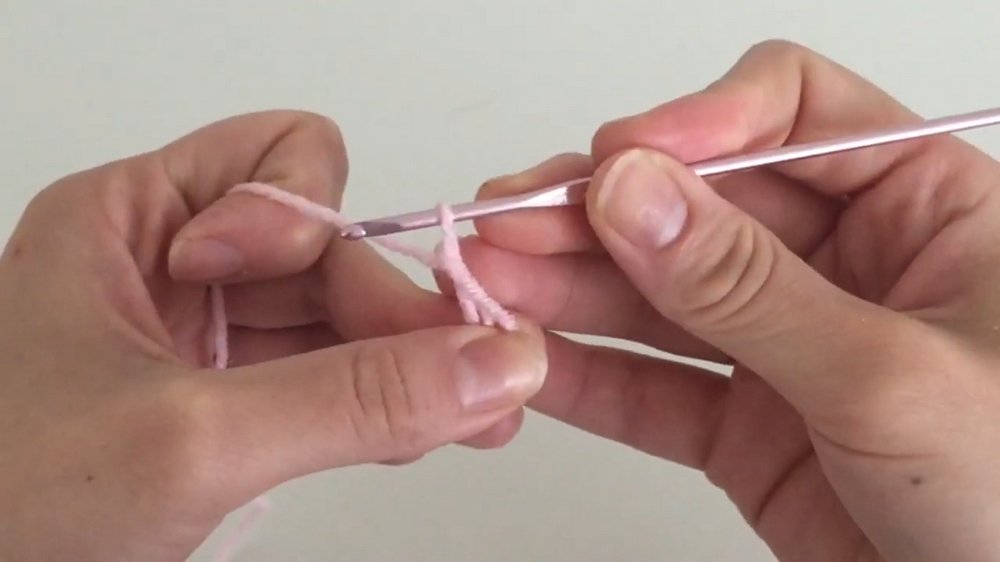
- Create a chain and form a small circle by connecting the ends of the chain.
- Crochet into the center of the circle, repeating 5–6 times to create a larger circle.
- Gradually increase the size by crocheting two stitches into one loop every third or fourth stitch.
- Shape the ball by reducing its size—skip a loop every fourth or fifth stitch.
- Leave an opening at the bottom, stuff the ball, and secure it.
Step 3: Crafting the Ice Cream Cone
- Begin with a small circle using the same method as for the ball.
- Form a 90° angle by crocheting only through the back part of the braid in each loop, creating the cone shape.
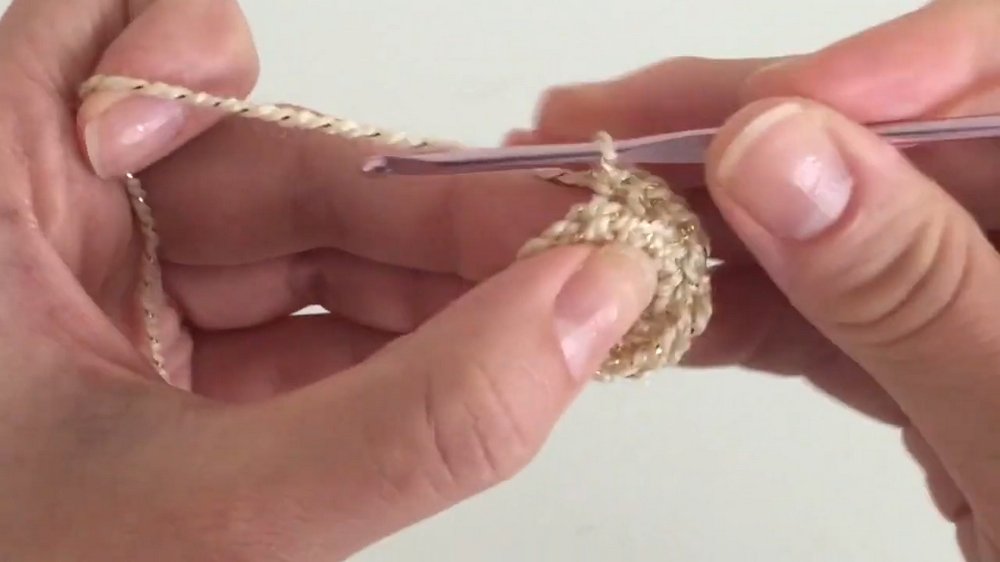
- Continue crocheting rows without expansion until the cone reaches your desired height (Moo uses four rows for a stubby cone).
- To create the cone rim, expand by stitching twice into every loop’s front braid.
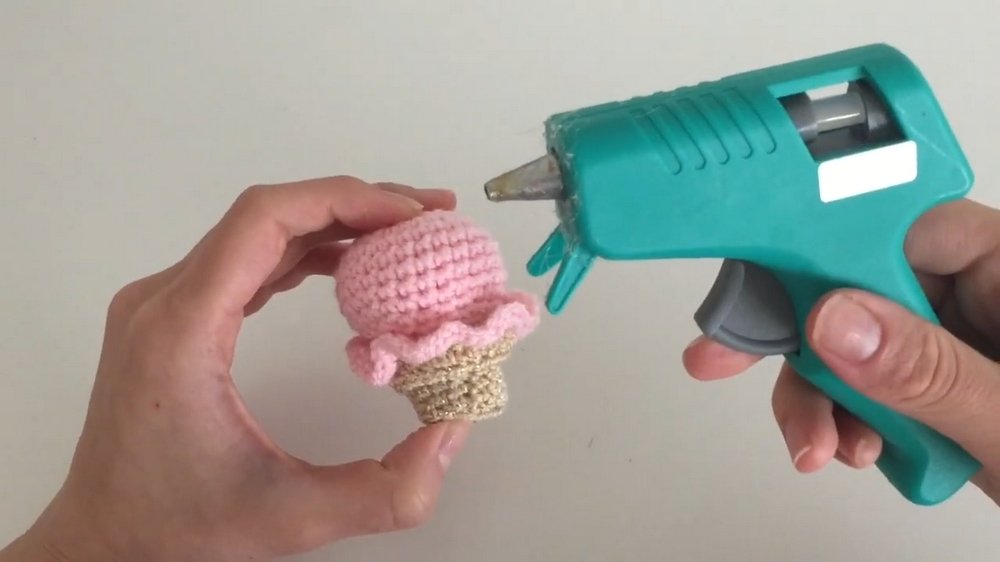
Step 4: Joining the Ice Cream and Cone
- Use a hot glue gun to attach the ice cream ball to the cone. Alternatively, crocheting them together is an option for a seamless look.
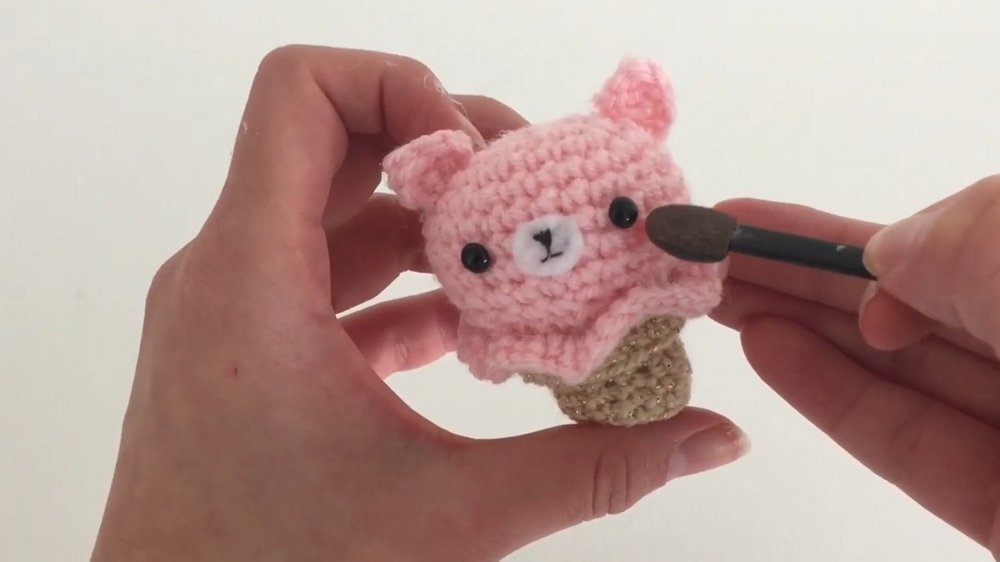
Step 5: Adding the Details
- Ears: Create small crochet knots, shape them into ears, and glue or crochet them onto the ice cream ball.
- Face: Prepare small white felt pieces for the face:
- Stitch a tiny nose and mouth using black sewing thread.
- Attach animal eyes with glue, or use alternative materials for eyes.
- Blush: Apply pink eyeshadow under the eyes for rosy cheeks. You can also add blush inside the ears for a two-toned effect.
- Whiskers: Use thin black sticks or fashion polymer clay whiskers, glue them on to give the kitty life-like charm.
Special Features
- Customization: Easily personalize colors, sizes, and facial details.
- Simplified Method: Using a hot glue gun makes assembly effortless.
- Creative Versatility: Suitable for gifts, keychains, or collectible decorations.
Difficulty Level
This tutorial is accessible to most skill levels. Beginners may require practice in forming circles and adjusting tension, while advanced crocheters can experiment with modifications and custom designs.
Tutor’s Suggestions
- Use any yarn or hook size you have available.
- Take your time to ensure tight, uniform stitches for better shaping.
- Moo encourages creativity with the face—experiment with sewing or painting for different expressions.
Suggested Uses
- Gifts for friends or loved ones.
- Decorative ornaments for desks, shelves, or nurseries.
- Cute accessories for keychains or bags.
Pro Tip
When making the ice cream ball, alternate expansion and regular stitches to maintain a smooth, round shape. If you want a firmer structure, use tighter stitches and denser stuffing.
Conclusion
This step-by-step crochet tutorial by Moo highlights how even a simple project can turn into an adorable masterpiece. With easy-to-follow instructions, materials you may already have, and room for customization, these kitty ice cream cones are a delightful craft for anyone. Have fun bringing these whimsical creations to life!