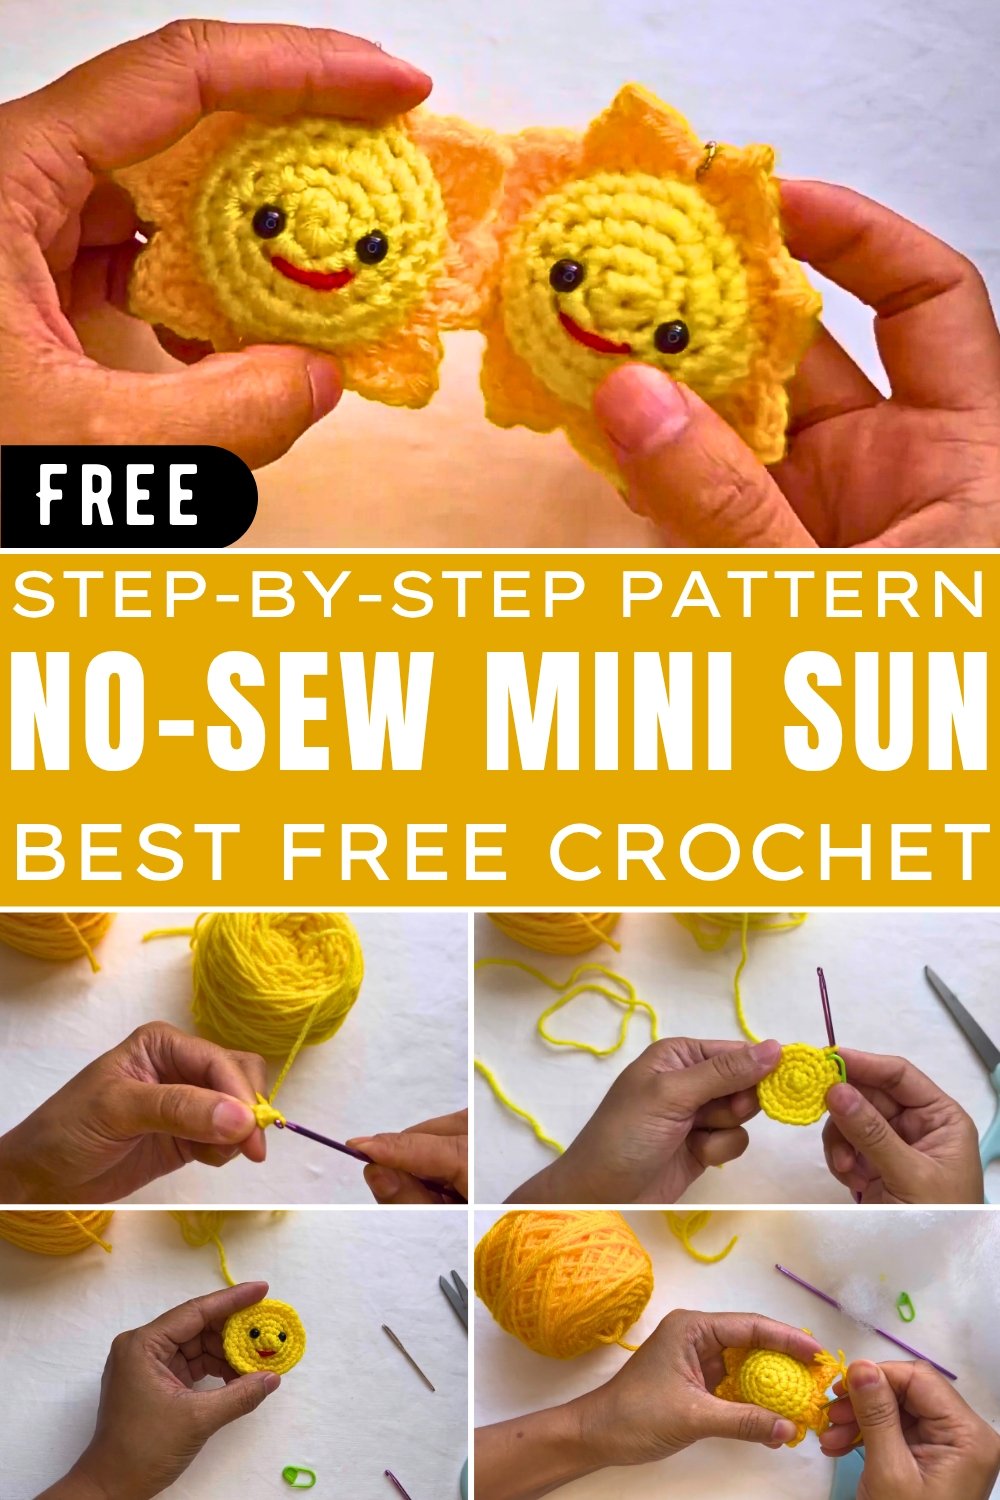
Versatile Crochet Mini Sun Amigurumi for Décor and Accessories
Bring a ray of happiness to life with the Crochet Mini Sun Amigurumi Pattern—perfect for cheerful décor, heartfelt gifts, and creative relaxation!
A tiny burst of sunshine can brighten anyone’s day, and few things capture that joy quite like a crocheted Mini Sun Amigurumi. Designed to radiate pure happiness, this charming little creation adds warmth to your world in more ways than one. Perfect for bringing cheer to any space, it’s small enough to work as a keychain, adorable enough to decorate a nursery, and meaningful enough as a heartfelt handmade gift. The thoughtful design makes it easy to personalize, whether you want to add a happy face or keep it simple and classic.
Quick Crochet Mini Sun Amigurumi Pattern for Everyone
This pocket-sized sun has a way of lifting spirits through its vibrant appearance and versatility. From sprucing up a bag to enhancing a shelf with playful décor, its uses are limitless. What makes it even more delightful is the calm focus it brings as you stitch each piece together—turning crafting into a meditative escape.
Everyone loves gifts that carry a personal touch, and this mini sun is the perfect way to send warmth and smiles to loved ones. Whether it’s brightening up someone’s day or simply adding a little sunshine to your surroundings, this adorable project is a beautiful reminder of positivity and light.
Introduction
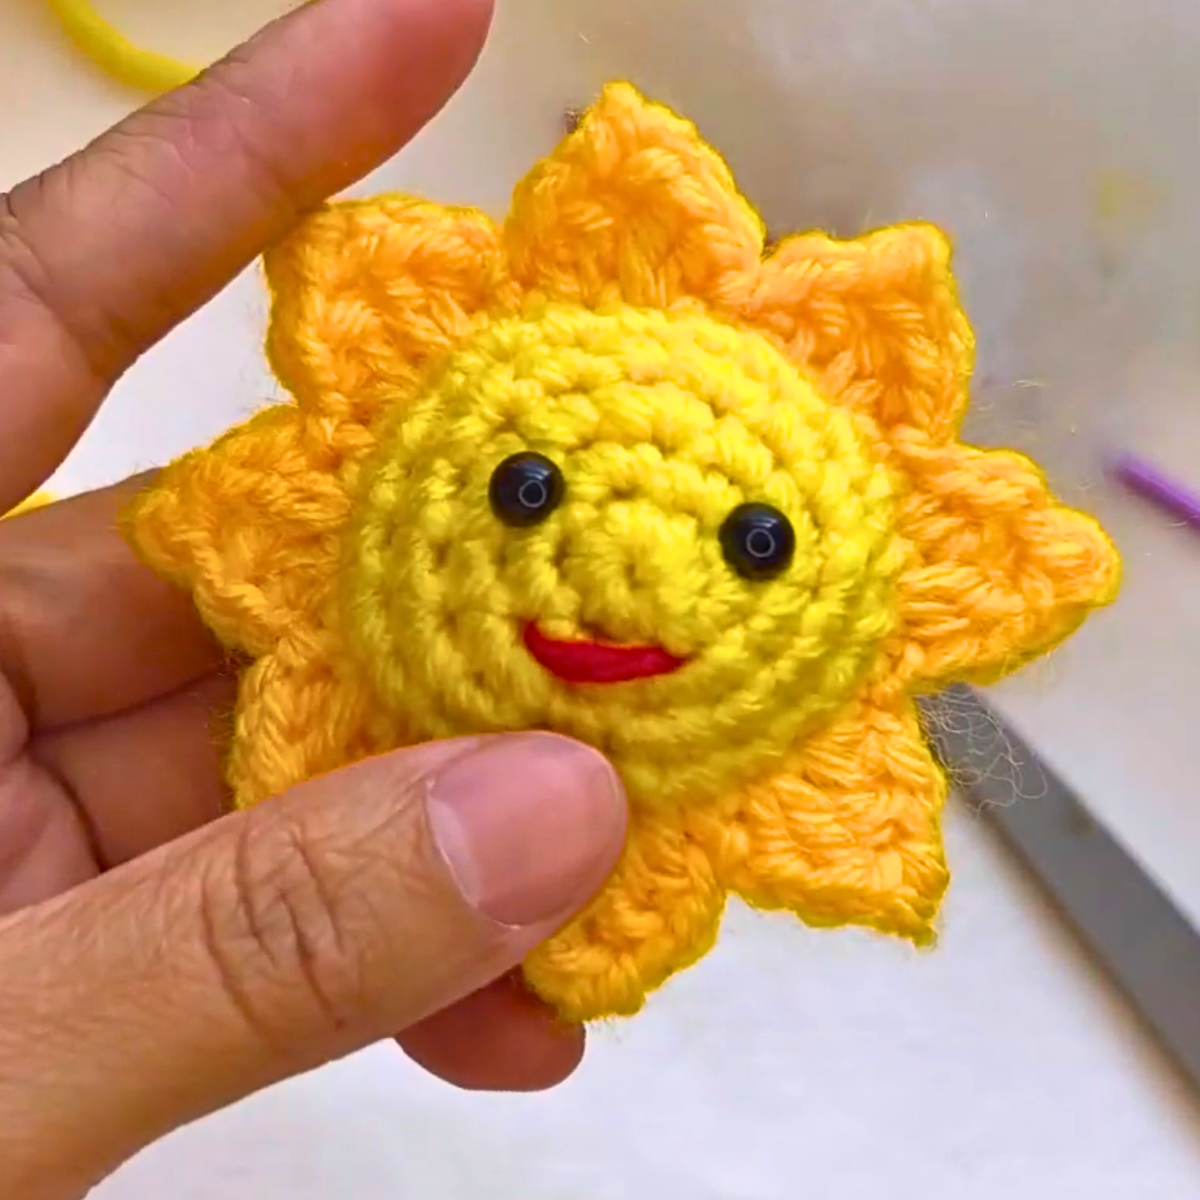
In this delightful tutorial by Judith, the owner and designer behind Giza’s Mama Crochet, viewers are introduced to a beginner-friendly crochet project: a mini sun amigurumi. This adorable handmade piece is designed not only to brighten your day but also to serve as a charming accessory or thoughtful gift. The step-by-step guide provides simple instructions, ensuring it’s accessible even for beginners, with suggestions for customization to make it your own.
Materials Needed
Judith lists the materials required to complete the project:
- Yarn in two colors (yellow for the sun and a contrasting color for details).
- 6mm safety eyes.
- 3mm crochet hook.
- Stitch marker.
- Needle for sewing and weaving ends.
- Polyfill for stuffing.
- A short piece of yarn for embroidering the smile.
Step-by-Step Instructions
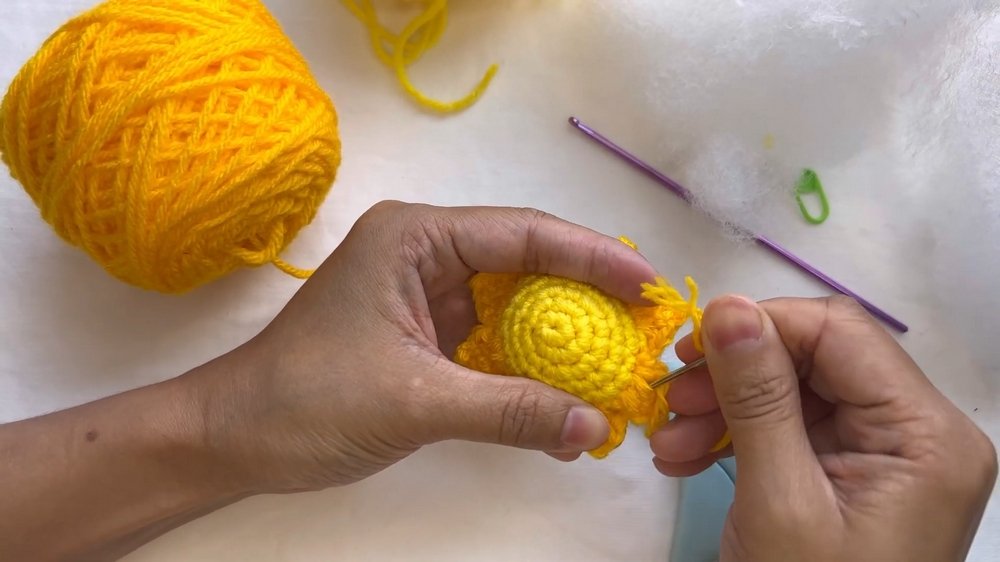
1. Create the Center Pieces
- Begin with a Magic Ring:
- Make 5 single crochets into the magic ring.
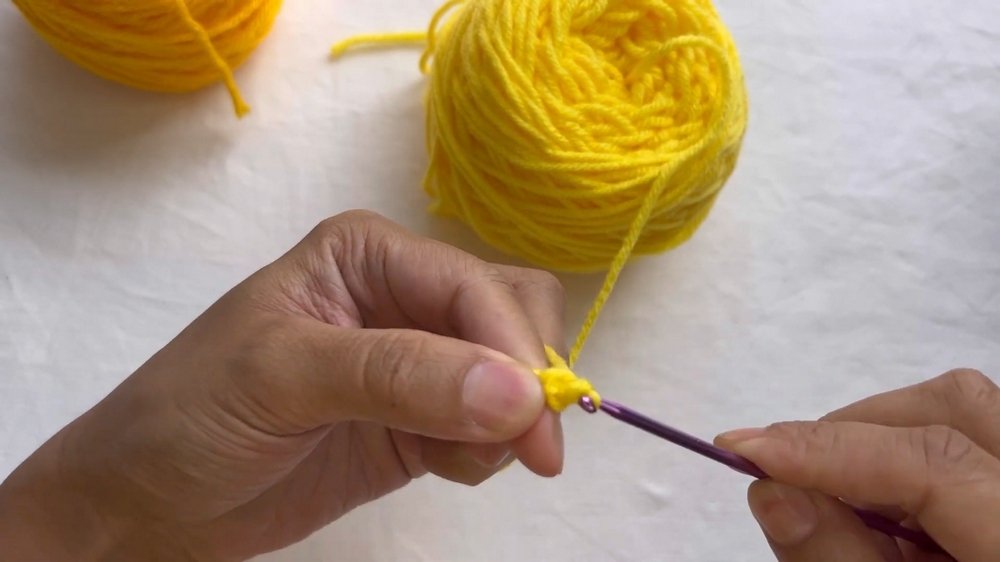
- Use a stitch marker to mark the fifth stitch and close the circle tightly.
- Make 5 single crochets into the magic ring.

- Round 2 (Increases):
- Make 2 single crochets in each stitch around (10 stitches total).
- Round 3 (Further Increases):
- Alternate between two single crochets in the same stitch (increase) and one single crochet in the next stitch (15 stitches).
- Round 4:
- Start with an increase, followed by one single crochet in the next two stitches, and repeat until the end.
- Round 5:
- Start with an increase, followed by one single crochet in the next three stitches, and repeat until you have 25 stitches.
Repeat to make two identical pieces for the center of the sun. Judith suggests weaving in the ends and tying the yarn tails to secure the work.
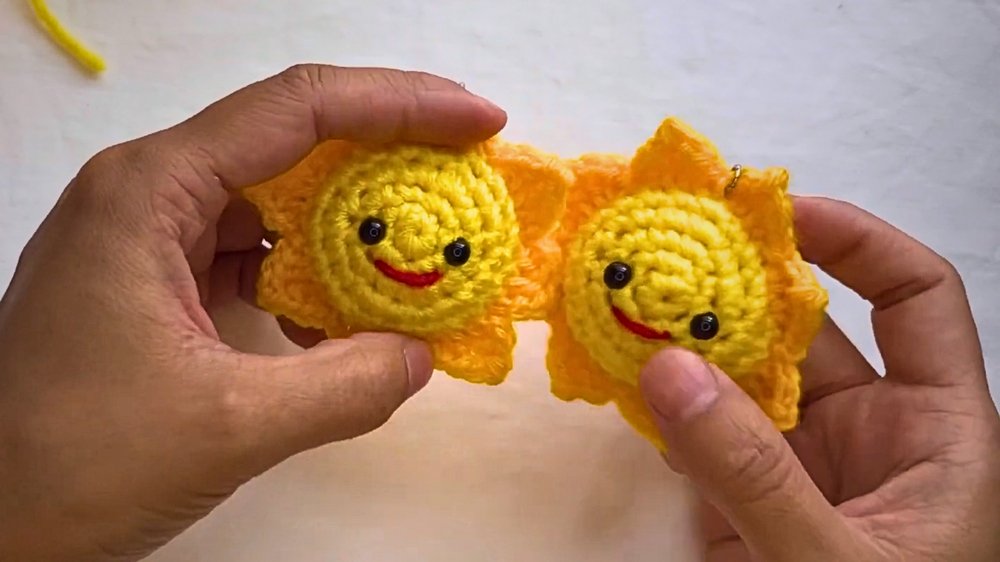
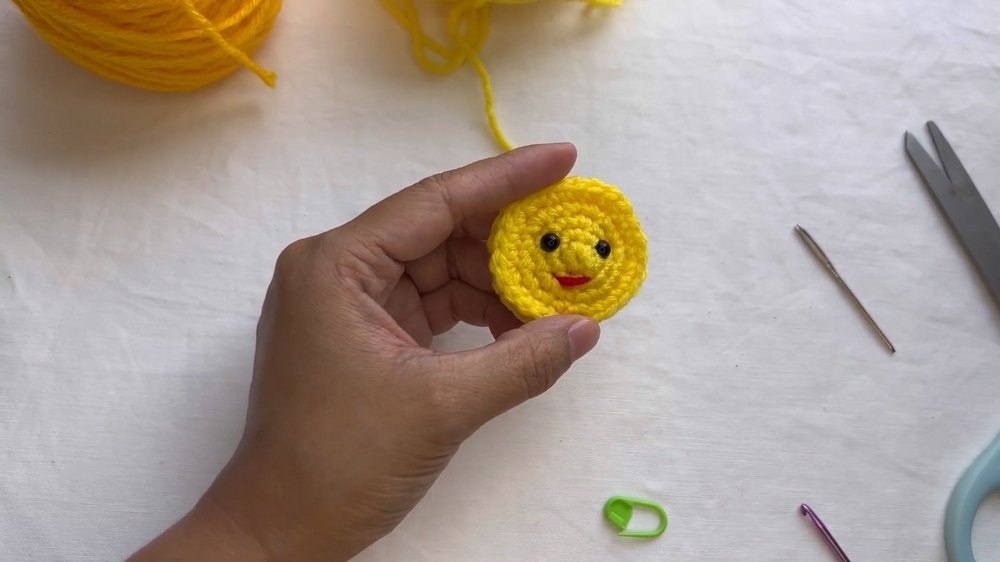
2. Assemble the Sun
- Attach Safety Eyes:
- Insert the eyes two stitches away from the center.
- Embroider the Smile:
- Use a contrasting yarn to add a smile, threading the needle carefully and tying off the ends.
- Join the Center Pieces:
- Stack the two crocheted circles together. Before closing, stuff the sun with polyfill for shape and sturdiness.
3. Add the Sun Rays
- Create Rays Around the Sun’s Edge:
- Use yellow yarn to make a slip knot and begin attaching it to the edges of the joined circles.
- Follow this stitch pattern around:
- Chain 1, half double crochet in the next stitch, double crochet in the next, chain 2, slip stitch in the second chain from the hook, double crochet, half double crochet, and chain 1 with a slip stitch in the next stitch.
- Repeat this pattern to create rays all around the sun.
- Finish Off:
- Cut the yarn and weave in the ends securely to prevent unraveling.
Special Features
- Beginner-friendly design with clear and simple techniques.
- Versatile as it can be customized as a keychain, car hanging, or decorative piece.
- Adds a handmade touch to gifts or personal accessories.
Level of Difficulty
Judith mentions that this project is beginner-friendly, making it ideal for those new to crochet. The instructions focus on basic stitches and simple increases.
Tutor’s Suggestions
- Adjust the placement of the safety eyes and embroidery for personalization.
- Stuff the sun tightly with polyfill for a more defined shape.
- Use bright, cheerful colors to enhance the sunny aesthetic.
Uses of the Mini Sun Amigurumi
- Unique keychain or bag charm.
- Car or room hanging for decorative purposes.
- Thoughtful handmade gift for friends or loved ones.
- A fun addition to home décor, especially in children’s rooms.
Tip
When stuffing the sun with polyfill, make sure to pack it tightly and evenly. This ensures the shape stays firm and does not lose its roundness over time.
Conclusion
Judith’s mini sun amigurumi tutorial is an engaging and accessible project that allows crafters to experiment with a small, cheerful design. Whether you’re crocheting for relaxation, gifting, or decoration, this beginner-friendly guide offers clear steps, making the process enjoyable and rewarding. With just a few materials and simple stitches, you can crochet a mini sun that truly spreads warmth wherever it goes.